March AJ Page-FLY

Hello friends!  Officially Spring has sprung, but I’m seeing some possible snow still in the forecast!  BLAH!  I sure how as we finish up this month, that April will be a little kinder to us over here.  With all of this weird weather in all different directions, I do hope that you’re staying safe and enjoying some craft time!

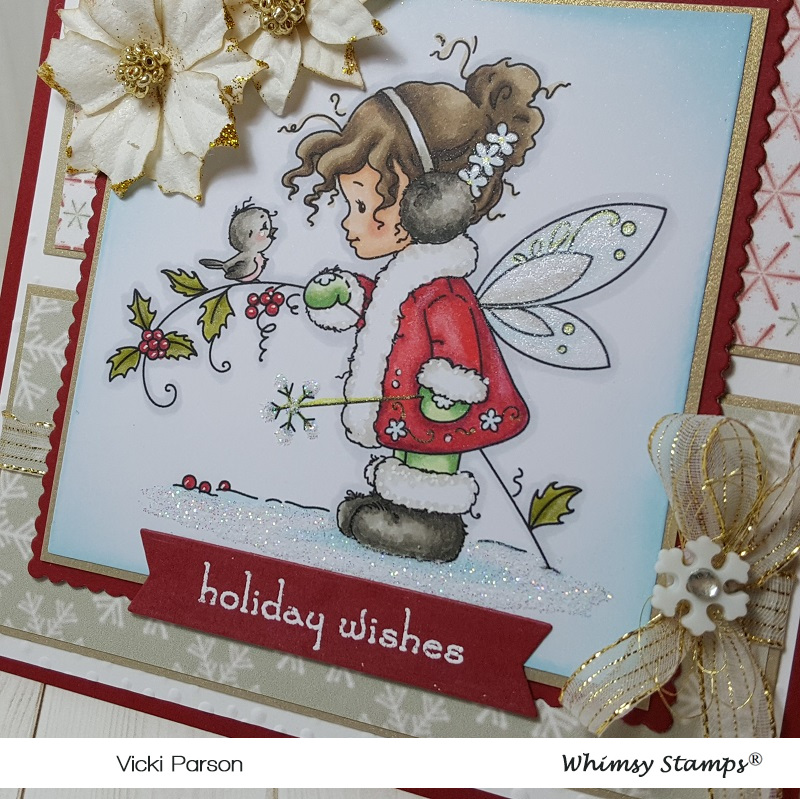
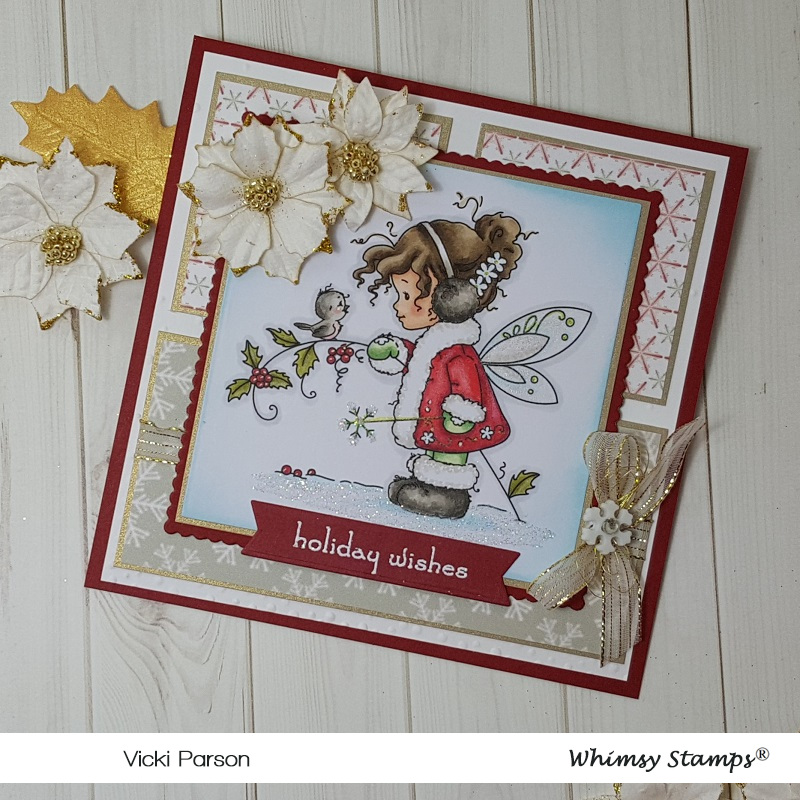
Speaking of craft time- If you’re not familiar, I post an AJ page each month along with my crafty friend, Carol (from Crafty-Stamper), as we get creative trying to use up our never-ending stash piles!  We use a prompt each month and post them.  I know she will have wonderful inspiration to share, so please check out her blog for an AJ page too! Here’s my AJ page for this month with the “SMASH OUR STASH” March prompt of “Find something/anything GREEN to use on your page” :

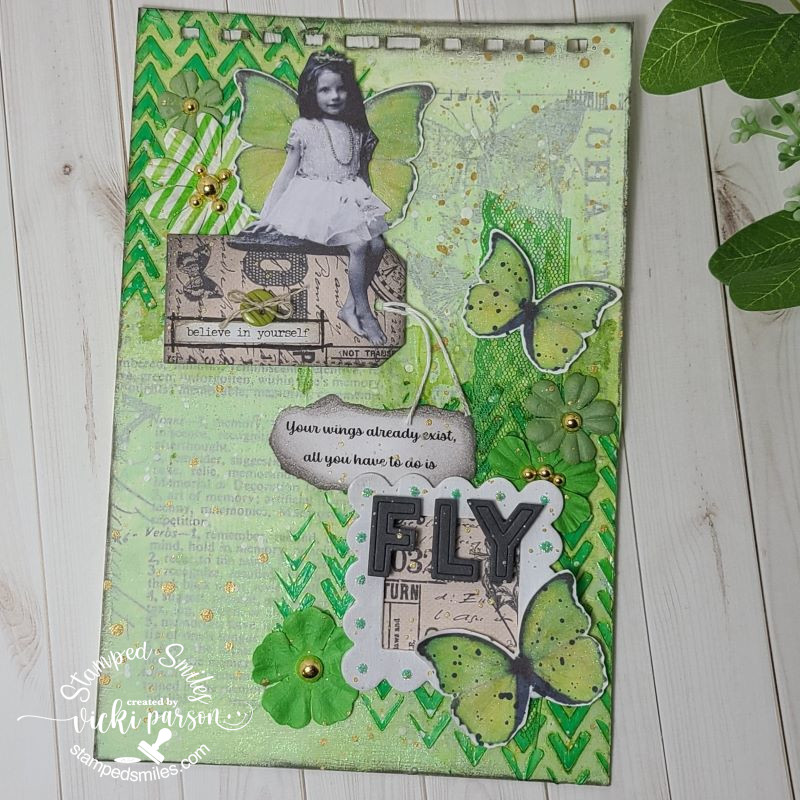
Thinking that I was REALLY in the mood to start seeing some green, I started digging through my stash and found SO MANY green things!  I didn’t realize that all you really need is a color to have so many different items to pull from!  I’m happy with all of the green items I found as I used several of them for my layout here.  I’ve got green paint, texture paste, metallic spray, flowers, lace, button, butterfly ephemera and green glitter Stickles!  I’m thinking I don’t use green enough, so I went with a monochromatic page.

For the background:  I started with some printed vellum attached with collage medium and went over top with a soft green layer.  I used an old stencil and went over the two corners with green paste. I then sprayed some green metallic over those two colors and moved it around with water until dry.  I splattered some white ink over top and set to dry.

Vicki-AJpageMar-Flybottom

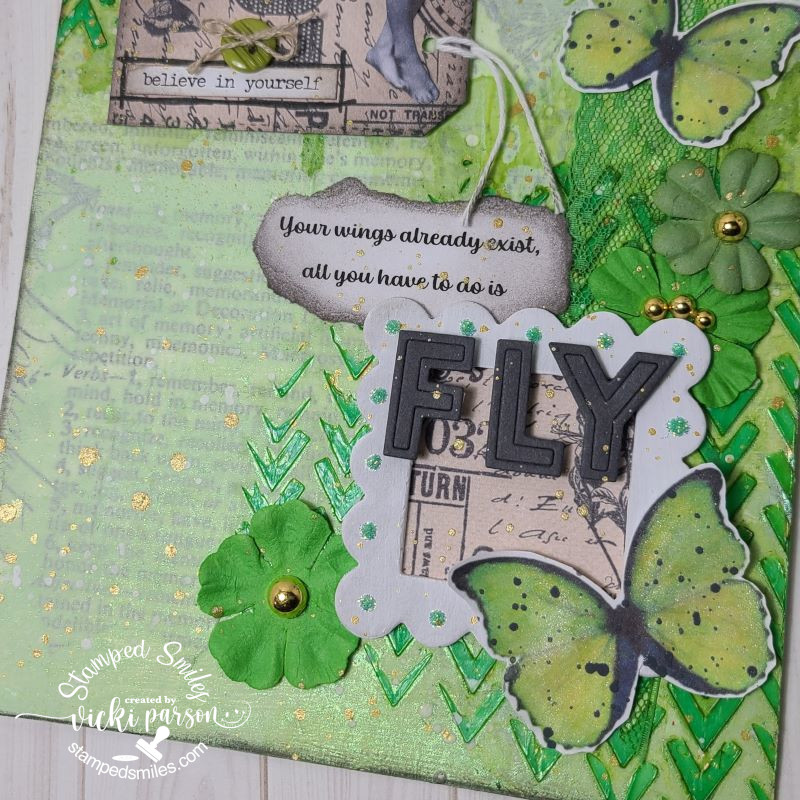
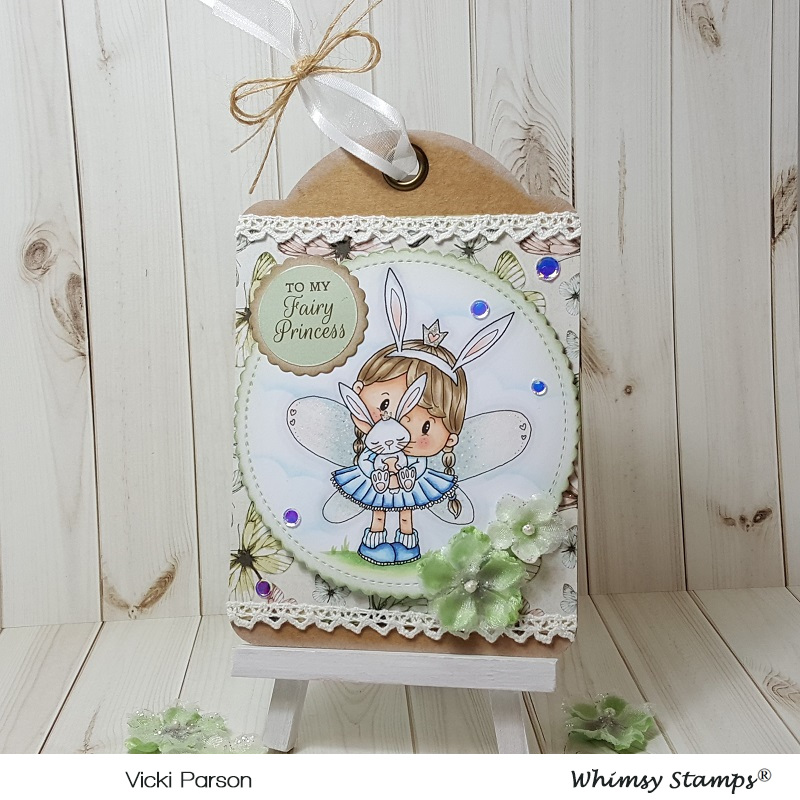
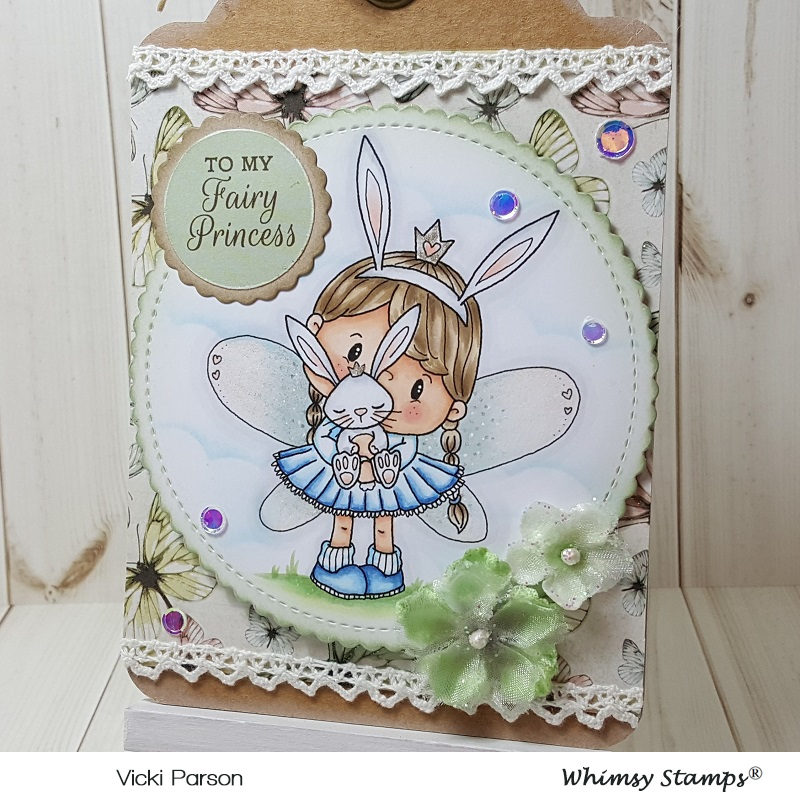
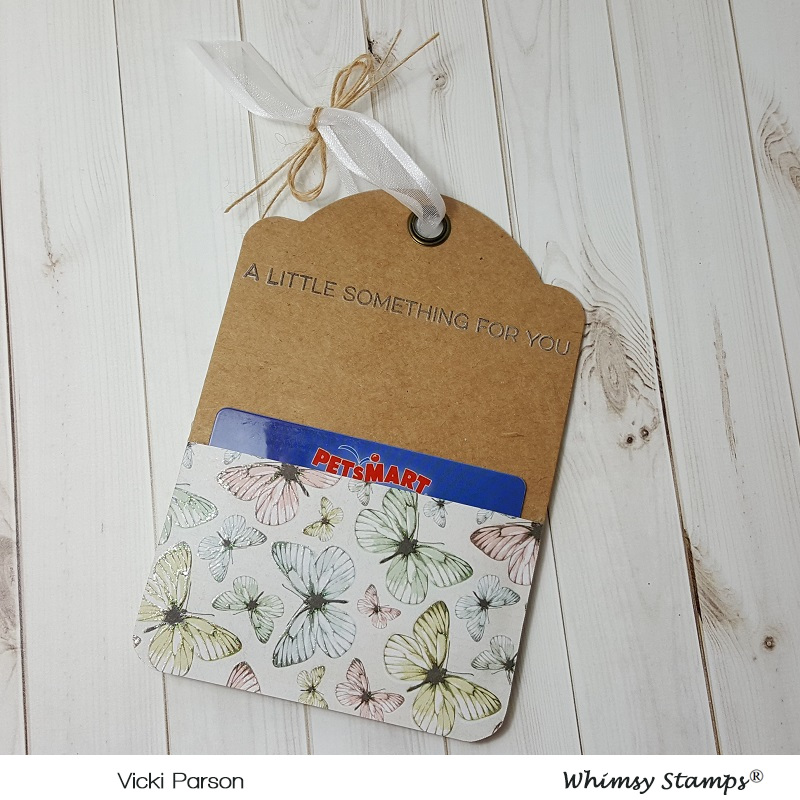
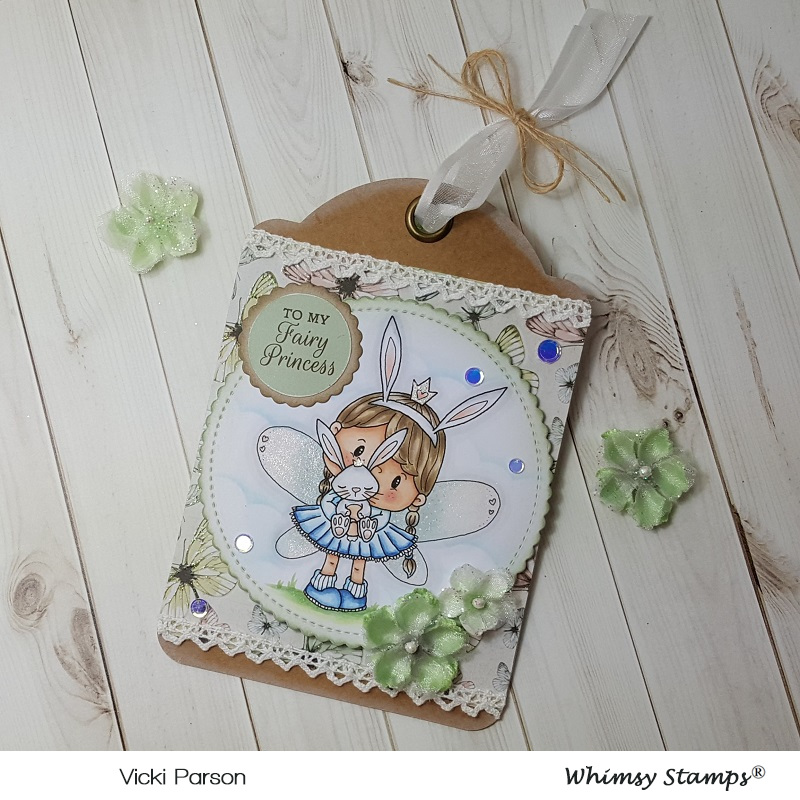
I added green lace on the right bottom along with my scallop chipboard square that I painted white and added some papers behind it.  I used those same papers to die cut a tag at the top and glued the fairy along with butterfly wings behind her over it.  I added the sentiment sticker that was lined out with a black marker and button over it and attached a string to the hole.  This was popped up with foam tape as well as the “FLY” die cut letters inside the white frame.  The ripped sentiment was computer generated and sponged with grey ink and tucked behind the white frame.  I added some green Stickles glitter to each scallop and tucked some green flowers with gold enamel dots in the center.  I also tucked more of those behind the fairy too.

Vicki-AJpageMar-Flytop

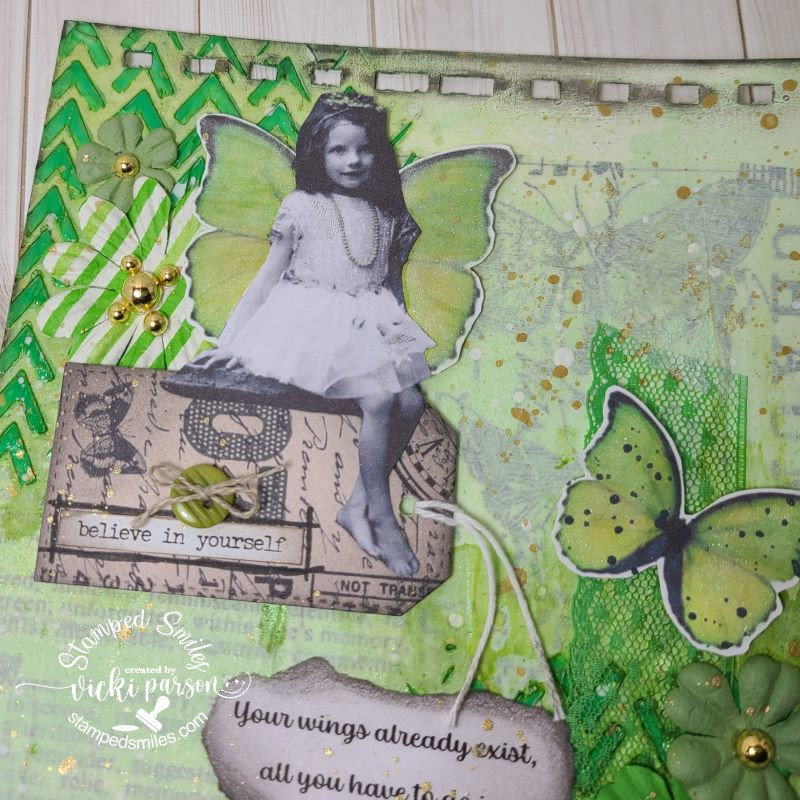
I covered the butterfly wings with a glitter brush pen and then splattered some grey ink over top of the wings before attaching them to the page with glue and foam tape… and before attaching the butterflies to the page, I covered up the fairy with a piece of scrap paper and used some gold paint to splatter over the page…and I called it done!

I enjoyed making this page with all of those GREEN things from my stash!  I hope you’ve enjoyed it too!  Thanks so much for dropping in and have a great weekend!

Challenges:

  1. Art Journal Journey – Anything Goes Art Journal
  2. Creative Artiste – Anything Goes Mixed Media
  3. Challenge Up Your Life – Monochrome
  4. Beyond the Blue – Green
  5. Ally’s Angels – Anything Goes
  6. A Place to Start – Anything Goes
  7. Through the Purple Haze – Anything Goes

Challenge Up Your Life-Fun in the Sun

Happy June 1st friends!  This month will bring us into the Summer months which means it’s time for all of those fun outdoor activities!  I’m also getting ready for lots of things going on this month including my son’s wedding!  So I know I’ll be busy!  How about you?

This is my last time to be joining the “Challenge Up Your Life” challenge blog as a guest designer.  I’ve had a great time with them as a guest for the past three challenges and appreciate being asked!  Today their new monthly challenge for June is “Fun in the Sun“.  Hope you can share your lovely creations with us this month!  (Check out the challenge blog for details and inspiration!)  And here’s my take on this theme:

What could be more fun than a cute little fairy sipping a drink floating on a lily pad?!  Love those shades too!

There happened to be a good sale on a few digital stamps from LOTV recently and so I snatched a few and this was one of them that I fell in love with.  This one is called Water Lily, of course.  (The sentiment also came from the same company.)  She looked like she was having some “fun in the sun” for sure, so I colored her up with my Copic markers and die cut the panel out with a stitched rectangle die.  I’ve also used a scalloped stitched die to cut out a piece of pink cardstock to go with some of the colors in the image.

For the background papers, I’ve found some great *yellow rainbow paper from Lawn Fawn and then I used a *sun die from My Favorite Things and cut out with some yellow glitter cardstock. (*These items have retired) I took a wave die from Lawn Fawn and cut out a strip from vellum and used my blue marker to add some color towards the top of the waves.  To attach the strip, I wrapped it around the layers and glued it from behind.  I then added the ribbon with the bow and attached these layers to an A2 top folding white card base.

Here’s a closer look at the image with the coloring I’ve done.  I’ve used a gold gel pen to color in her head band and then a silver one to color in the little “dots” on the ends of her glasses.  I used a glitter brush pen over her sunglass lenses as well as her wings.

I finished the card off with a few colorful sequins.

So does that look like something you’d be having some “Fun in the Sun” with?!  I know I sure would!😎

I sure hope to see you playing along with us this month with your creations!  I also hope that you’ve enjoyed my inspiration as guest designer for these challenges the last few months.  Thanks for your support friends!

Challenges:

  1. Creative Knockouts – For the Kids
  2. Colour Crazy Craft – Anything Goes with coloring
  3. Crafty Catz – Anything Goes optional “All About the Girls”
  4. Creative Fingers – Anything Goes
  5. Allsorts – Anything BUT birthdays
  6. Everybody Art – Glitter and/or Pearls
  7. Creatalicious – Anything Goes optional: lots of bling/glitter
  8. Creative Moments – Summer is Here

Adelina Fairy from Digi Doodle Studios Celebrating Peace & Happiness for 2021🎉

Hello friends!  It’s New Year’s Eve and I’m so excited to kick this year to the curb…how about you?!  Whatever your plans are to ring in the New Year, please stay safe and enjoy sharing with those you love for hope of peace and happiness in the New Year for 2021!❤🎉

Today, I have a card that I’ve made for a challenge deadline and needed to have it in by today, so I wanted to be sure to share it with you all:

This was actually a “Digital freebie” from the Kit and Clowder Group Advent Calendar of Events they do every year.  Digi Doodle Studios gave away this darling image called Adelina-Fairy

I made this card and colored up this sweet image as the Digi Doodle Studios Facebook Group was holding a special “coloring challenge” using this specific image and I wanted to make sure that it met the deadline for getting it in and so I actually posted it in there yesterday, but I’m posting on my blog today along with more photos and details.

The image is beautiful with her poinsettia flowers and so I wanted to be sure to color it up with red and green colors in mind…although I think she would be great for ANY occasion as well as coloring the flowers differently.  I used some die cut circles for cutting her out with and then layering her over a die cut piece of gold mirror cardstock.

I’ve used some poinsettia decorative papers from my stash for the background and layered some red poinsettia embossed strips layered with gold mirror cardstock over the background before adding the layered circle image on top.  The embossed strips also had white ink rubbed over top lightly to emphasize the textures.  I white heat embossed a sentiment and cut it out with a banner die to place on the bottom corner with craft foam which is what I also added behind the image circle panel too.

Before attaching the bottom strip to the card, I also added some gold cord and a bow.  I finished off the card with three poinsettia flowers from my stash.  The entire card measures 5″ square.

Here’s a closer view of the image and how I’ve got her colored up.  I added some really subtle shading with my Copics underneath her legs for shadows.  I did my usual white gel pen for checks and hightlights and then I used a gold gel pen for coloring in the dots on her wings and in her hair.

Really enjoyed coloring this gorgeous image and it’s awesome that I now have another Christmas card ready for next year as well!  Thanks so much for stopping in today!  Hope that you’ve enjoyed my final card and post for the year.

I want to thank each and every one of you for the wonderful support, kindness and friendship you have given to me this past year.  It really means so much to me and it’s been quite a year of creativity too!  I see that so many of my favorite companies are represented as my top photos which tickles me so much!

Here’s to wishing us ALL a happy, healthy and prosperous life in 2021!!🎉

See you in the New Year friends!

Challenges:

  1. Digi Doodle Studios Facebook Group – coloring challenge
  2. Double D – Poinsettia
  3. Colour Crazy Craft – Anything Goes + coloring
  4. Creative Moments – #205 Anything Goes
  5. Die Cut Divas – Anything Goes December

Make a Wish for Whimsy Stamps

Hello friends!  Wow!  We are getting so close to Thanksgiving now within a few days!  I know that most people have been full steam ahead with making Christmas and I have really been quite festive myself with my own creations!  Today, I wanted to suspend the ‘Merry Making’ for just a moment….

Vicki-SZPreciousPresent-Nov26

This little cutie digital stamp is appropriately named Precious Present from Whimsy Stamps and she’s another adorable fairy image by Sylvia Zet.  You could certainly change up the colors to make her more festive, but I just felt like taking a “wee” break (LOL..Wee Stamps…see what I did there?!) and make something soft and light.

After coloring her up, I used the Whimsy Stamps Notched Square Dies to cut her out with and then layer with more panels behind her.  I also took a glue pen and went along the edges of the image panel then covered with some clear glitter.  I did the same with the purple strip in the background and the layer behind the sentiment panel, but just used some pretty sparkly purple glitter.

The background papers including the sentiment panel came from a pretty paper pad called “Fairy Garden” by Kaisercraft that I had purchased earlier this past Spring.  Love how soft and light the colors and patterns are in it.  I also found the perfect Stampin’ Up! cardstock color for my card base and one of the image layers called “Certainly Celery”.  It’s an oldie but a goodie for sure!   I finished it off with some more of that clear metallic ribbon (my fave) with a bow at the edge of the sentiment panel along with some twine and a button.  I also added some flowers by Prima and a couple of pearls in the corners of the green layer behind the image.

Vicki-SZPreciousPresent-Nov26-close

Here’s a closer view of the coloring I’ve done for this image using Copic markers.  I kept things really soft and simple for this.  I did add some shimmer over her wings with a Spectrum Noir glitter brush pen and I used a pink metallic gel pen to color the “dots” above her head.

The layers were popped up with foam tape and I’ve also popped up the sentiment layer with foam tape over that as well.  (You can see the glitter in the pink layer that was die cut too!  This came from that paper pad I mentioned above.)

Vicki-SZPreciousPresent-Nov26-flat

I hope you’ve enjoyed my non-Christmas card today!  I think you could turn it into something festive and I thought about doing that, but then decided I wanted to use soft and light colors and turn it into maybe a birthday type card.  Besides, I love soft subtle colors and lots of sparkle…so it was fun to put together!  🙂

It already has me longing for Spring and winter hasn’t even really started over my way yet! LOL!!  I do have TONS of creations going on in my craft room and haven’t really been sharing them on my blog, but I hope to be getting to that very soon as we are approaching the December month and there will be so much to share!  I’m excited to be sharing things with you soon!

Thanks so much for stopping in and have a wonderful day!

Challenges I’d like to enter this card for:

  1.  The Fairy and Unicorn – November Anything Goes + fantasy themed
  2. Fab ‘n’ Funky – Add a Button(s)
  3. Little Red Wagon – Birthday Card
  4. Alphabet Challenge – ‘R’ is for Ribbon
  5. Creative Moments – Anything Goes with optional:  Ribbons and/or Bows
  6. QKR Stampede – #373 Anything Goes

Anything Goes at Cute Card Thursday with Holiday Wishes

Hello friends!  I hope you’re having a great week so far!  I’m trying to enjoy the warmer temps while I still am able to before it starts getting too cold out!  I wish I wasn’t feeling achy either, so hopefully that will improve too!

Today starts a new challenge for Cute Card Thursday and this week is our monthly “Anything Goes” challenge!  We’re sponsored by Whimsy Stamps and of course you know I’m using one of those images for my card today:

Vicki-WS-CCT607

How sweet is this one!  This digital stamp is by Sylvia Zet called Wintry Fairy from Whimsy Stamps.  Really love coloring up her sweet images!

For the background white layer, it’s hard to see, but I have used a snowfall embossing folder over it.  I also took a couple of the Whimsy Stamps Christmas Fun digital papers, printed them out and cut some sections for my card layout.  I layered them with some brushed gold cardstock and put them over the white embossed layer.  The piece at the bottom also has some gold ribbon wrapped around it that I added before attaching to the white layer.  These layers were mounted over a piece of red 5″ square top folding card base.

I also white heat embossed the sentiment from the Whimsy Stamps Holiday Mini Sentiments clear stamp set and then cut it out with the Whimsy Stamps Quick Strips die set.  I cut it twice so that I could get the length that I wanted and then glued it over the bottom of the layered image panel.

I then added a gold ribbon bow with some gold thread nested underneath a snowflake button that I covered with a rhinestone.  I also attached some white poinsettia flowers from my stash.

Vicki-WS-CCT607-close

Here’s a closer view of the image and how I’ve got her colored up with Copics.

I used a white gel pen for the bird’s cheeks and the berries as well as places on her coat.  You can see that I also took a gold gel pen and added details to her coat as well as her wings.  I then covered her wings and the flowers in her hair with a glitter brush pen.

For the snow t the bottom, I took a glue pen and loose clear glitter over top.

I used a square die cut to cut her out with and layered onto a piece of brushed gold cardstock and then another layer of red cardstock that was cut with a scallop square die.

Vicki-WS-CCT607-flat

I hope that you have enjoyed my card today!  It’s always great to get another Christmas card done before the rush gets going!

Please excuse me for a few days as I’m not feeling well, but hopefully will be around to visit with you soon!  Thanks so much for stopping in as I enjoy reading and smiling and sometimes giggling over your comments! 🙂   I will see you soon!

Challenges:

  1.  Love to Craft – Nov Anything Goes LTCCB40
  2. Sheepski Designs – Christmas is Coming!
  3. The Fairy and The Unicorn – Nov Anything Goes + Magical/Fairy
  4. Creative Fingers – Anything Goes
  5. Pammie’s Inky Pinkies – PIP1944 Anything Goes
  6. Unicorn – Christmas/Winter
  7. Daisy Chain – Christmas/Winter

Sending Snail Mail Hugs

Hello friends!  Yippee!  It’s finally “officially” Fall now! (According to the calendar anyway.) We are very slowly starting to get lower temps at least in the evening time anyway.  I’ve gotten out my Fall decorations and I’m ready!  How about you?

Today I have a very sweet image from Whimsy Stamps to share with you:

Vicki-WSLoveSlowMuch-Sept24

Awe!  I wouldn’t normally hug a snail, but I must say, this one is SUCH a cutie don’t you think?  This digital image is called “Love You Slow Much” from Whimsy Stamps-Sylvia Zet’s Wee Stamps Collection which was previously released as a rubber cling stamp.  So now you can have the option of choosing the digital or the rubber versions!

Of course, with Fall having started, I was really inspired to create with this cutie in some orange, yellow and tan toned colors!  With the exception of that blue bow tie on the snail, I’ve colored it differently as I think that makes him really stand out especially for dispensing hugs…or perhaps receiving them! 🙂

I’ve cut out the image with a stitched circle die and then die cut another larger circle in the orange color to mat behind that.  I’ve taken a piece of decorative paper from my stash with the wording and added some stitch marks along the edge of it with a black marker and then mounted it to a piece of white cardstock.  I wrapped some white organdy ribbon around these two pieces and mounted it onto an orange 5″ square top folding card base.

I took another piece of orange cardstock and die cut a tag out from an older Whimsy Stamps die that I have and then I stamped the “hugs” sentiment from the Whimsy Stamps Everyday Mini Sentiments clear stamp set towards the bottom of the tag and added it to the bow on the ribbon.  Lastly, I took some flowers and attached them around the card design.

Vicki-WSLoveSlowMuch-Sept24-close

Here’s a closer look at the coloring I’ve done on this image and used the following Copic markers:

  • Snail Body:  W7, W5, W3, W1, R00
  • Snail Shell:  E35, E33, E31, E30
  • Snail Bow Tie:  B26, B24, B21
  • Fairy’s Dress, Hair Flowers, Shoes, Wings:  YR07, YR04, YR02, BG000, C7, C5, C3
  • Fairy’s Hair & Skin:  E47, E44, E42, E41, E21, E11, E02, E00, E000, R20
  • I used BG000 and E0000 for around image and shadows
  • I’ve also used a gold gel pen for the center of the flowers in her hair and over the tiny marks behind her wings.  I’ve used a white gel pen for highlights in the Fairy’s cheeks as well as highlights on the snail’s shell.  I took a glue pen over her wings and added some clear glitter over them.
  • I’ve also used a Copic marker (unsure of color) to color a rhinestone for the center of the orange flowers.

Vicki-WSLoveSlowMuch-Sept24-flat

I hope you’ve enjoyed my creation today and that it has inspired you in some way!

Thanks so much for stopping in today!  I always appreciate your support!  I’ll be seeing you soon!!

Challenges I’d like to enter this card in:

  1.  Creatalicious – Anything Goes with optional circles
  2. Stamps & Fun = Creativity – Anything Goes
  3. The Paper Girls – Anything Goes
  4. The Fairy & The Unicorn – Fantasy Anything Goes
  5. Creative Knockouts – Anything Goes
  6. QKR Stampede – Anything Goes #364
  7. Creative fingers – Anything Goes
  8. Always Fun – Cute Critters

Wee Snippet & Mystic for Whimsy Stamps

Hello friends!  I hope you are having a wonderful week so far!  Thank you for all of your kind comments and wishes from my posts last week!  I really appreciate it so much!

Today I have a creation to share with you using a wonderful magical/mystical image from Whimsy Stamps:

Vicki-WeeSnippetMystic-June11

I have used this gorgeous image called Wee Snippet & Mystic by Crissy Armstrong.  This was previously released as a rubber stamp, but this month it has become available in digital format too!

I sort of let the colors of the card pull together after I had colored in the image and then I went from there.  I thought that this image would look nice with a woodgrain theme, so I’ve also taken some of the Whimsy Stamps Rustic Wood and Brick digi papers collection and cut a section and layered it with some purple cardstock for behind the image panel.  I had some pretty green colored woodgrain papers with flowers on it from my stash and used that for the background of the card design which was mounted over an A2 sized top folding card base.  The white woodgrain panel has some metallic purple ribbon wrapped around it that I’ve attached to the background of the card.

I’ve used a die to cut some edging accents for the sides of the image panel with the same color of cardstock as the background layer.  I popped this up over the card design with some craft foam.  I then added a stitched banner piece at the top right of the card design that hung over the image panel and then I have die cut some flowers from the Whimsy Stamps No-See All Seasons Tree Die set, sponged some ink around the edges and added them to the design.  I took some Purple Nuvo Crystal Drops and added a dot to the center of each one.  I’ve also taken a sentiment from an older Whimsy Stamps set and stamped it in black in the bottom corner of the card.

Vicki-WeeSnippetMystic-June11-close

Here’s a closer view of the coloring on the image.  I’ve used the Copic markers listed below to color with and then used a few gel pens to add details.  I took a glue pen and went over the horn on the unicorn as well as along the edges of the die cut image panel and sprinkled on some clear glitter.  Before attaching the glitter along the edges of the image panel, I used an ink foam blending tool and some Wilted Violet distress ink over it.

  • Wee Snippet’s outfit/flower and Mystic’s saddle/reins/horn – V17, V15, V12, YG13, YG11, BG10, BG000 (gel pens for dotted accents)
  • Wee Snippet’s hair – Y11, Y15, Y17, E31
  • Wee Snippet’s skin/eyes – E000, E00, E11, E21, R20, R00 BG45
  • Mystic’s mane/tail – E49, E47, E44, E43
  • Mystic’s body/eyes – C3, C1, R11, R00, E25 (eyes)
  • Shadowing – C1, C0

Vicki-WeeSnippetMystic-June11-flat

I tried to incorporate everything that I thought would bring out the “magical” essence of this image from the several layers with the paper, the glitter and metallic ribbon too.  I hope you’ve enjoyed my card today and I really appreciate you stopping by!  I’ll see you again soon!

Challenges I’d like to enter:

  1.  Creative Knockouts – Anything Goes
  2. Creative Moments – Anything Goes
  3. QKR Stampede – #351 Anything Goes
  4. Allsorts – Fantasy World
  5. Pammie’s Inky Pinkies – Anything Goes PIP1923

Fairy Princess Bunny With a Pocket!

Hello friends!  Hope you have enjoyed your weekend.  Yay!  We are finally getting some decent weather to be outside in!  It’s been rainy and chilly for a while, so it’s been nice to see some sun the last few days!

Today I have this really sweet image to share from Whimsy Stamps May Digital release and a fun extra added element with it!

Vicki-PC Fairy Princess Bunny Tag

I have made a tag using this really sweet Pollycraft image from Whimsy Stamps called Fairy Princess Bunny.  Isn’t she so sweet?!  I found some pretty papers to go with her and placed it over a purchased kraft colored tag that I sponged some white ink around the edges.

After placing the papers where I wanted them and trimming it down, I also attached a lace trim on each end of the papers over the tag.  The papers also had a bunch of sentiments included in the pack, so I added the circle sentiment to the tag and then die cut a kraft piece to layer behind it.  I also added some flowers and the ribbon at the top and then finished it off with some clear sequins.

Vicki-PC Fairy Princess Bunny Tag-close

Here’s a closer view of the coloring I’ve done on this cutie.  I’ve used Copic Markers to color her in with using the following markers:

  • Dress, shirt, shoes, socks – B37, B34, B32, B01, B00, B000
  • Bunny, bunny ears – R11, R00, R000, C3, C1, C0
  • Wings – R00, R000, E000, BG000
  • Hair – YR30, E41, E43, E44, V95
  • Skin – E000, E00, E11, E21, R20, R00
  • Grass – G24, G21, G20
  • I used gel pens to make dots on wings and color in the crowns on the girl and bunny heads.  I also used a Wink of Stella glitter pen to go over the wings.

After I colored her in, I cut her out from a circle stitched scallop die and then sponged around the image with a cloud stencil and distress ink.  I also sponged around the edges of the scallop circle with another color of distress ink and mounted her over the tag with a piece of craft foam behind her.

Vicki-PC Fairy Princess Bunny Tag-otherside

So, when you flip the tag over, you can see that I’ve made a little pocket with the same papers I’ve used on the front of the tag.  I thought this would be a cute way to give out a gift card to your “Fairy Princess”.  The tag happens to be the perfect size for adding a pocket for a gift card to fit into.

Vicki-PC Fairy Princess Bunny Tag-flat

I hope you’ve enjoyed my little tag creation today!

THANKS SO MUCH FOR DROPPIN BY!!  HAVE A GREAT DAY!!

challenges:

  1.  Crafty Creations – Anything Goes
  2. Fab ‘N’ Funky – Anything Goes #437
  3. Crafty Catz – Anything Goes with optional twist of females
  4. QKR Stampede – Anything Goes #347
  5. Crafting By Designs – Fantasy

It’s the April Anything Goes for Cute Card Thursday!

Hello friends!  This week has completely flown by me so very fast!!  I can’t believe how quickly it went and I’m thinking being outside in the warmer weather will make it go even quicker!  Summer will be here soon, right?!

Today is Thursday and also the first Thursday of the month, which means it’s time for our regular “Anything Goes” theme at Cute Card Thursday!  We are also sponsored by our regular monthly sponsor Whimsy Stamps!  So of course, you know I’m going to be using one of those for my creation today:

Vicki-CCT576-WSElfie

Isn’t she just a cutie?!  This newly released digital image is called Elfie from Whimsy Stamps.  I’ve been starting to see a few lady bugs here and there around my area, but I actually don’t like it when they are everywhere!  Otherwise, I can take them on a card and think they’re so cute!

After coloring her up, I cut her out with a stitched circle die and layered another circle with black cardstock behind her.  I also cut out the Whimsy Stamps Friend Word die set with black cardstock and set it aside to work on the rest of my card.

I pulled out this embossing folder with lady bugs (by Darice) and embossed a piece of red cardstock with it.  I took some white ink to lightly go over it to highlight the texture a bit.  I layered this piece onto a piece of black and then layered these over a white A2 sized top folding card base.  The circle image was place towards the right of the card and then I just cut off the excess circle with scissors.

I stamped the “hello” from the Whimsy Stamps Painted Sayings clear stamp set with black ink next to the image.  The “friend” die cut piece was glued at the bottom of the card.  I also took the WS Quick Strips die set to cut out a couple of stitched banners from some shimmer paper and added them to the side of the circle.  Lastly, I’ve put the black gingham ribbon bow over the banner strips and added the lady bugs and sequins to the design.  I filled the sequins with some Nuvo White Blizzard Glitter Drops.

Vicki-CCT576-WSElfie-close

Here’s a closer look at the coloring of this cutie.  I’ve used some Copic markers to color her in and then I’ve used a Wink of Stella Clear Glitter pen to add some shimmer over her wings and the wings on the butterfly.  Here’s the list of Copics I’ve used:

  • Hat, skirt, shoes and ladybug – R39, R37, R35, R32, C8, C5, C3
  • Shirt, leaves – G24, G21, G20
  • Hair – E49, E47, E44, E43
  • Skin – E21, E13, E00, E000, R20

Vicki-CCT576-WSElfie-flat

I think there are so many different ways you could color up this image, but I saw her holding this little ladybug and so I just went with that theme when coloring.  Hope you’ve enjoyed my card today and got inspired!

Challenges I’d like to enter this card for:

  1.  Sketch Saturday – #557 Choose a Sketch
  2. QKR Stampede – Anything Goes #341
  3. Just Us Girls – Wild Card Week – embossing folders
  4. Artistic Inspirations –  #214 Just for Fun (Anything Goes)
  5. Crafting From the Heart – #240 Anything Goes
  6. A Bit More Time to Craft Anything Goes

Imagine…You’re Home!

Hello friends!  I have to say that I’m very happy that we’ve started the month of March and I really look forward to seeing the bit of green and growth soon to come!

Today, I have a card using this new stamp set:

Vicki-SNSCottage

Today, my card features this really fun Lil Garden Cottage rubber stamp set.  I have colored it up with my Copic markers and I’ve used the packaging from the stamp set to help with color suggestions.  (I really like that when stamp sets have a colored version on their product labels!)

Since last year I’ve been noticing lots of “fairy garden” projects, and I am amazed at how many “tiny” items that are available to purchase so that you can create your own little garden!  This image sort of reminds me of that!  I think I like creating my own little “fairy garden” on paper! 🙂  Do any of you like to make Fairy Gardens?

For the base of my card, I’ve used an A2 sized top folding kraft card base.  I took my VersaMark ink to stamp the tiny mushroom images from the set along the bottom edge of the base.  I also took another piece of kraft cardstock and heat embossed part of the sentiment with the White EP and then cut it out from a circle die.  I set these pieces aside while working on the rest of my card.

Vicki-SNSCottage3

After coloring in the image, I also took the other portion of the sentiment “Imagine…” and stamped it next to the cottage image, but then heat set that one with the Coffee EP.  I also took an additional piece of white cardstock to layer behind the image panel.  For that piece, I took my VersaMark ink pad and sponged along the edges of it and also heat set that with the same Coffee EP as well.  You can also see at the top of the image panel that I’ve lightly blended in some distress ink to soften up the white a bit.

For the sparkly twine at the top, I created it by taking the 1/4″ Tear Tape and twisting it on itself and then I ran it through some Shamrock Glitter.  I took a piece of it to make a bow and then glued it over my design.

I took some craft foam to pop up this image panel a bit before attaching it to the kraft card base.  I also took some more craft foam to pop up the side of the circle sentiment panel as well.

Vicki-SNSCottage2

To add a bit of detail to my image and make it my own, I stamped, colored and fussy cut out each of the mushrooms as well as the snail and then attached them where I wanted them to show up on my image panel.

I used the Nuvo Precision Glue Pen to “color in” the areas where I wanted it to be green and then sprinkled some of that Shamrock Glitter over those areas.  I took the Nuvo White Crystal Drops to add a few “dots” over the red mushroom.  I then took the Nuvo Morning Dew Crystal Drops (dries clear) and filled in the “window” on the cottage as well as the “snail shell” to add some shine to it.

Vicki-SNSCottage4

I hope you’ve enjoyed my card today and that you’ve been inspired!

Thanks so much for dropping in today!!  I’m so hoping that I can get back into catching up with you and getting caught up on entering challenges!  I do miss all of this!

Wishing you a happy day!