Challenge Up Your Life with a RAINBOW!🌈

Hello friends!  I don’t know about you, but I’m so happy to see the month of May starting!  That means the flowers will be coming out along with the warmer weather!  It’s also a great time of the year to see a rainbow perhaps?!

#147_regenbogen_CUYL

Today I’m super excited to be joining the “Challenge Up Your Life” challenge blog as a guest designer!  I had previously won a Top 3 and a future guest design spot from a past challenge I had entered, so I’ll be joining them as a guest for April, May and June challenges!  Today their new monthly challenge for May is “RAINBOW“.  Hope you can share your lovely creations with us this month!  (Check out the challenge blog for details and inspiration!)

Here’s my guest design creation for this month’s challenge:

Nothing better than to look up into the sky and see a rainbow!  What’s also fun is to be able to create your own and especially on a card to send to someone to brighten their day!  I’ve used a previous card kit from Taylored Expressions that contained these products:  Make a Rainbow Stencils, Over the Rainbow clear stamp set, Rainbow Cloud Duo dies, and Over the Rainbow Sentiments clear stamp set to create this card.  I ink blended the different colors through the rainbow stencil and stamped the orange dots over the rainbow as well as a few hearts in light blue ink. The sentiment was also stamped with black ink over top of the rainbow.  I then die cut the one cloud twice from white cardstock and ink blended some light blue around the edges of it and popped it up with foam tape at the ends of the rainbow.

Then the card front panel was ran through the die machine using the Taylored Expressions Diagonal Stitch Rectangle dies (Which actually doesn’t cut anything out, but creates the lines.)  I layered it onto a piece of black to make the rainbow pop a bit more and then attached it to an A2 sized top folding TE Pineapple card base.  I also topped it off with a couple of TE Bits & Pieces-Full of Heart sequins. 

I knew the minute I went to create for this challenge that my zippered pouch from Taylored Expressions that has the “A Rainbow of Possibilities” sticker over it was what I was going to grab!  All of my rainbow things are in it!  Makes it easy to grab when you know everything is in there!

I hope you’ll stop over at the challenge blog and join with us to share your rainbow too!

I hope you’ve enjoyed my card or been inspired!  Thanks for stopping by and I’ll see you soon!

Challenges:

  1. Sweet Stampin’ – Rainbows & Rainy Days
  2. Arty Divas – Anything Goes
  3. Penny’s Paper-Crafty – Anything Goes
  4. Krafty Chicks – All Occasions (encouragement)
  5. Creative Fingers – Anything Goes

Sparkly Rainbow Smile🌈

Hello there friends!  Just popping in here today to share a smile with you!

The MFT Summer School lessons continue with Day 2: RAINBOW!  For me, nothing says “smile” like a rainbow and we certainly need plenty of smiles these days!😀

Vicki-MFTsummerschool-day2rainbow

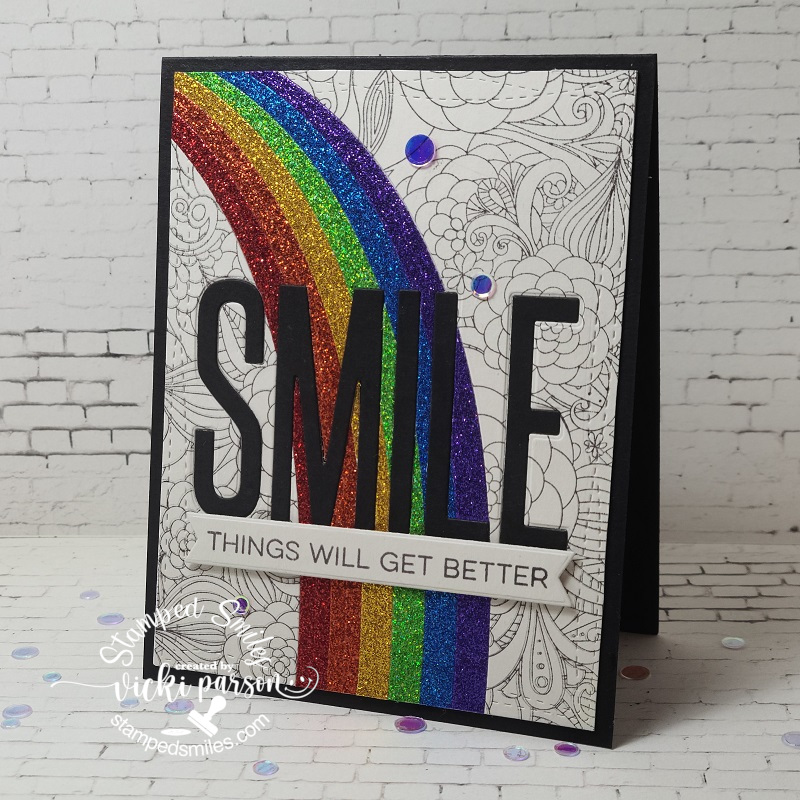
I wanted the rainbow on my card to really stand out, so I’ve used an older MFT background stamp no longer available called “Floral Fantasy” and stamped it with Steel Gray Ink over a piece of Grout Gray cardstock that was cut out with the Wonky Stitched Rectangle die.

I used the “End of the Rainbow” die no longer available, but similar to THIS ONE in the store, to cut through the background and then I used the different strips in the rainbow to die cut the different colors of glitter paper to fill it in with.  I used the Sunset and Mermaid glitter paper stacks for the strips.  I then took an older MFT SMILE die and die cut over top of the rainbow and stamped background.  I die cut the words again with Black Licorice cardstock and inlaid the letters over top of the background.  I mounted the background over an A2 sized top folding Black Licorice card base.

Lastly, I stamped the sentiment from the “All Smiles” stamp set (no longer available) over more of the Grout Gray cardstock and cut out with a banner die and popped it up underneath the die cut letters with foam tape.  I finished the card with some sparkling clear sequins.

Vicki-MFTsummerschool-day2rainbow-close

Here’s a closer look at the glittery rainbow that I’ve inlaid for the background as well as the “smile” letters too.  Hopefully, you can see from this angle how all of it is incorporated into the background of the design.  The only thing that I popped up was the sentiment banner.

Vicki-MFTsummerschool-day2rainbow-flat

I hope that you’ve enjoyed my card today and it helped bring a smile your way!  Thank you so much for taking the time to stop in today my friends!  I’ll see you soon!

Challenges:

  1.  MFT Summer School – Day 2 Rainbow (ROYGBIV)MFT_SummerSchool2020_Rainbow
  2. The Corrosive Challenge – #8 Anything Goes
  3. Pammie’s Inky Pinkies – PIP2031 Anything Goes
  4. Little Red Wagon– #561 Happy Days
  5. Aud Sentiments – #257 Anything Goes + a sentiment
  6. Creative Knockouts – #362 Sparkle & Shine
  7. Crafts Galore Encore– #78 August Anything Goes

Whimsy Retreat Crafty Fun Results

Hello friends! Hope you’re having a great week! I’m so glad you’ve joined me today as I have lots of fun creations to share with you!😀

This past weekend Whimsy Stamps held a “virtual craft retreat” in their Facebook Group, so I thought I’d tag along and join in on the fun! I’m glad I did because I made several cards:

The first challenge given was a tic-tac-toe challenge. I did 3 down: birthday, heat embossing and circles for mine. Almost had 2 bingos…but didn’t quite work out! Aren’t those penguin eyeballs the best?! LOL! I needed to send out a birthday card to someone so this was great timing!

The background papers, cover die, sentiment die and the penguin stamps are all from Whimsy Stamps. I even put little ice cube confetti for my shaker card!

This card was made for the second challenge given during the event which was to use a sketch and a color palette using at least 2 of the colors given. This was my take on the sketch along with using blue, green and brown from the palette.

Most all of the items used on this design came from an older card kit from Whimsy Stamps. The stamp set is still available in the store called Enjoy the Journey. For the sentiment panel, I heat embossed a sentiment from this stamp set and then used the Slimline Postage die to cut along the edges of it.

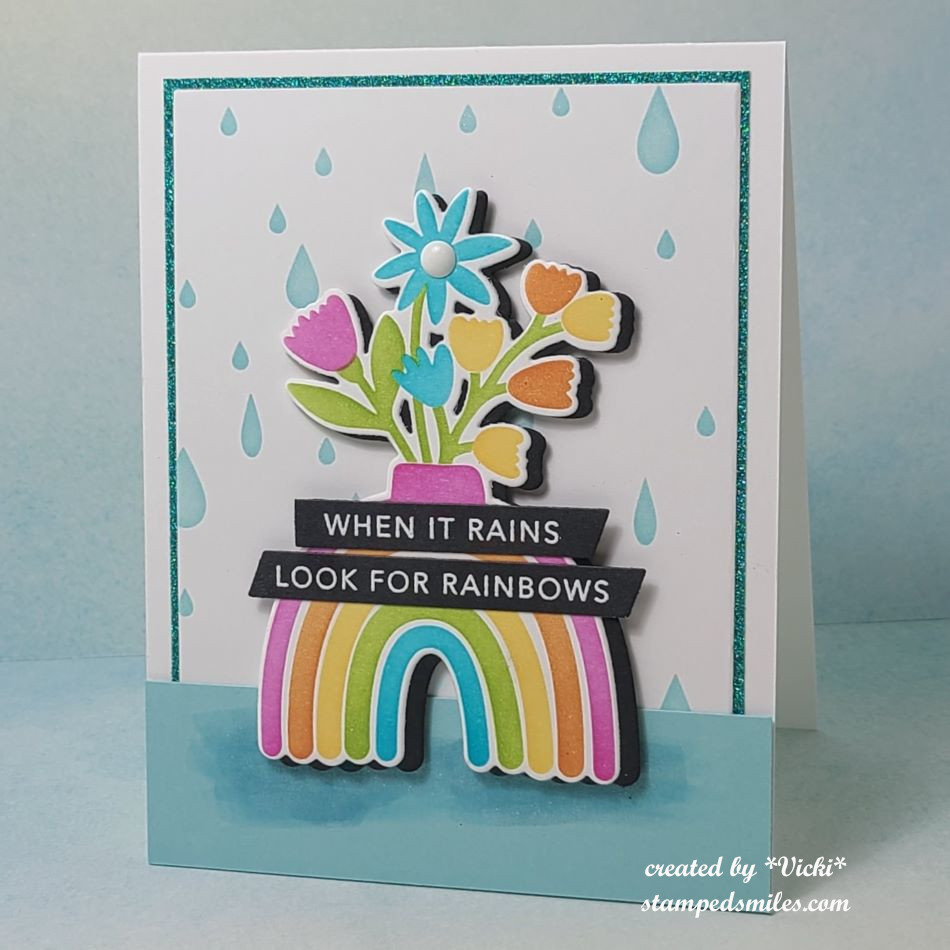
Tihs is the card that I created for the third challenge issued which was to follow a photo prompt with words: “When it rains, look for rainbows. When it’s dark, look for stars.” The first thing that came to my mind was these cool Rainbow Papers from Whimsy Stamps and so I’ve cut a panel out with an older Whimsy Stamps die along with the image panel.

This image is called Rainy Day Smiles by Sassy Cheryl’s which is what I had actually won as a prize from the event over the weekend for one of the games..so that was cool! I wanted to be sure to use it for one of my cards! I added some raindrop crystals on a few areas of the image too.

This card was made for the fourth challenge given which was simply to create a project with one of the digital freebie images that was given during the event.

Facebook actually kicked me out of the event a few times for leaving too many comments! LOL! I was trying to participate in games and it told me that I was leaving too many comments! This was one of the cute freebie images that they gave at the event called Sloth. After all that happened…I felt that this little guy was laughing at me!🤣🤣🤣 So I wanted to laugh right along with him, and I printed him out, colored him with Copics and used the Whimsy Stamps Notched Square dies and layered him over some papers from my stash and attached to a 5″ square card base that I stenciled some clouds on along with the background of the image. I die cut some leaves from the Whimsy Stamps No-See All Seasons Tree die set to add to the top corners of the image panel.

Needless to say, I did “hang in there” right along with him!!😄

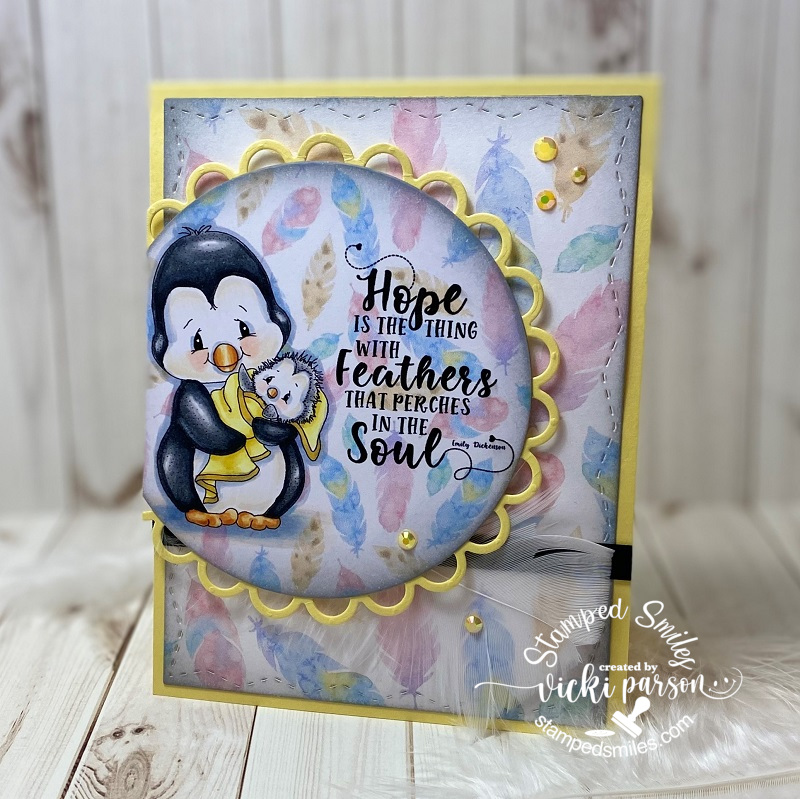
And last but not least, the fifth challenge was to make a project based on one of the video tutorials that was shown at the event. Of course, I’m always inspired by Crissy Armstrong and her coloring! This sweet little penguin called Penguin Momma was a freebie given during the event and I watched Crissy color this up and I tried my hand at her tips and tricks.

I was also inspired by Jeanette Comerford and her tutorial with combining the penguin with the other digital feather papers and sentiment. (The background papers along with a couple of sentiments were given as a digital freebie during the event as well.) Really loved that look and so I’ve emposed the penguin over the background papers along with the sentiment over it to create my card.

I printed out another piece of the feather background and cut it out with the Whimsy Stamps Zig Zag Stitched Rectangle dies and added my own white feather to the design. I sponged some grey ink around the edges of the printed papers and added some yellow crystals.

  • I had such fun creating these projects and pulling out my Whimsy Stamps stash for the challenges. And now I have a few cards for sending out to people that I already have in mind! Hope you’ve enjoyed my makes today and I’ll be seeing you again soon!! (The links in this post contain affiliate links if you want to purchase anything! Thank you!!)

Challenges:

  1. Creatialicious – Anything Goes optional birthdays
  2. A Bit More Time to Craft – Anything Goes
  3. Love to Craft – Anything Goes
  4. Crafty Creations – Anything Goes
  5. Colour Crazy Craft – Anything Goes + colouring
  6. Crafty Friends – Anything Goes
  7. Creative Craft Cottage – Anything Goes
  8. Creative Moments – Anything Goes
  9. Lil’ Patch of Crafty Friends – Anything Goes

ATCs With Flowers, Rainbows and Stencils…Oh My!

Hey there friends!  Hoping you had a wonderful weekend and ready to start a fun week ahead!  Although we’ve been having some cool and rainy days this week, I know that some nice warm weather is on it’s way and I’m really looking forward to it and getting outdoors to my flowers!

For today, I have something a bit different that is not a card, but I think a really cool and fun way to experiment with different media and ideas…especially on a smaller “non-intimidatingly” way.  I’m talking about those ATCs (Artist Trading Cards for the newbies)!  It’s like a “fun size” candy bar in small bite form…these are like the “fun size” of the traditional A2 sized cards!  LOL!  They’re normally 3 1/2″ x 2 1/2″ which is similar to the size of a business card.  They’ve been around for years since I started stamping and newer to me are the round coin ones.  (I will attempt those at another time, I’m sure!)

I had a few challenges in mind and found some time yesterday to have a play:

Vicki-BRM-StenciledRainbowATCs-close

Rainbows seem to be a huge deal right now and I think there is even a special day dedicated to them!  I also was wanting to play with my crafty stash.

For the ATC on the left, I used the stencil and some embossing paste over a piece of watercolor paper and set aside to dry.  While that was dry, I cleaned off the stencil and used it on another piece of white cardstock and used my distress inks and ink blending tool to create a rainbow background for another ATC (right).  I ended up stamping the bicycle over it with black ink and then sprayed the panel with some shimmer spray.

Going back to the dry embossed paste panel, I took some Creamy Aqua Pigments and added rainbow colors at the top and then sprayed them with water and let it drip down.  I let the colors run and even left some white on there as you can see above.  I let it dry and then splattered some black watered down paint to splatter over it with a paint brush.  I then stamped the clouds from the same stamp set, fussy cut them out and popped them over the background.

On both ATCs, I white heat embossed the sentiments over black cardstock and cut them out with my scissors to place over top.  For the bicycle ATC, I added some metallic Fibers along with some flowers.  Part of the sentiment was popped up on foam tape for both of them.  One of the clouds was popped up with foam tape on the left one.

Super fun to play and create with!

______________________________________________________________________________________

I had made one early last month too, but never posted it, so I thought this would help fit it in for today:

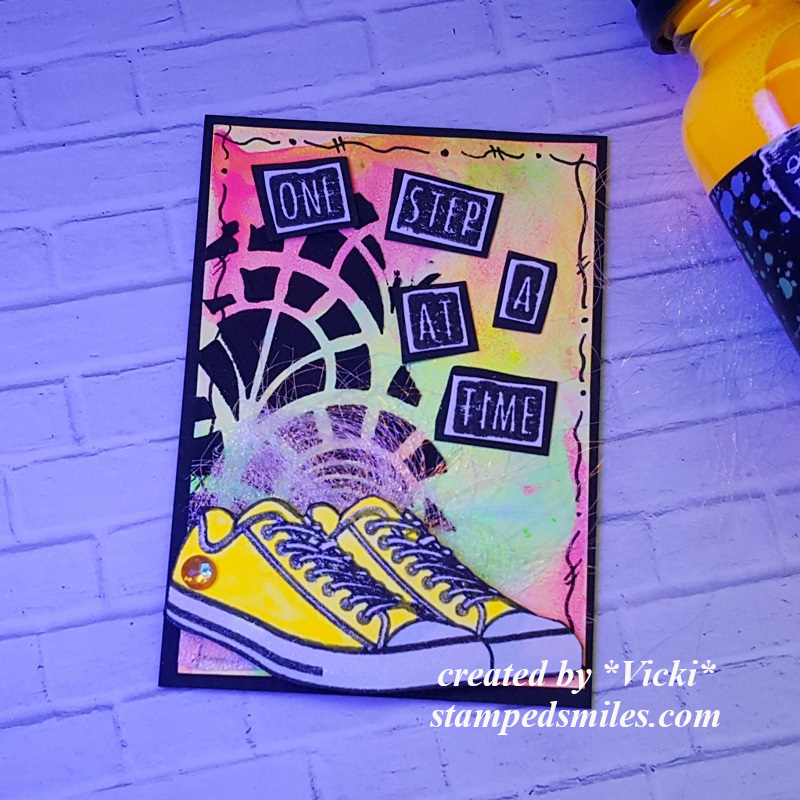
Vicki-NeonshoesATC

Not really a “rainbow” theme, but this was sure fun to create and doodle around with!

For this one, I finally got a chance to play with my Neon Aqua Pigments! I used the “smoosh technique” with them for this background and let it dry.  Then I used some black embossing paste over the Wallpaper stencil.

I also stamped the shoes and colored those in with the Neon AP and popped it up with foam tape over a another piece of the metallic Fibers like I used on the “bicycle ATC” above.  I also took  glitter pen to go over the shoes and added a yellow rhinestone to it.  From the stamp stamp set, I took the sentiment and stamped it in black ink, fussy cut it out and layered it over some black CS and fussy cut it out leaving a border.  Each one glued over the background.  I took a black pen and doodled along the edges.

Vicki-NeonshoesATC-neonglow

And of course, when you shut the lights off and turn on your black light, you can REALLY see the fun and funky neon colors glow on it!!  Even this photo doesn’t do it justice because it looks so fun in person!

Vicki-NeonshoesATC-back

For my ATCs, I’ve been attaching them to Chipboard for sturdiness.  I also added the Artist Trading Card Labels for the backs of them.

Hope you’ve enjoyed my ATCs today and gave you a little inspiration to try one out for yourself!  But I have to warn you….just like those “fun-sized” candy bars, you can just have one!!  LOL!

Thanks for dropping in today friends!!  Enjoy your week!

Challenges: (For top ATCs only)

  1.  ATC Around the World – Flowers (Bicycle ATC only)
  2. Creative Crafting Uncles – Anything BUT a Card
  3. Creativ Fusion Arts & Crafts – Anything Goes
  4. Happy Little Stampers ATC – Rainbowmay 2020 atc
  5. Crafty Friends – Flowers (Bicycle ATC only)
  6. {Cupcake Inspirations} – CIC493 “Let’s Roll!” (Bicycle ATC only)CIC493 Bike Theme Let's Roll
  7. A Bit More Time to Craft – #116 Anything Goes

Spots and Dots for Cute Card Thursday

Hello friends!  Hope you’re having a great week so far.  The month of October is flying right through and I know once Halloween gets here, it will be the end of the year before we know it!

Today starts a new challenge over at Cute Card Thursday this week!  We are looking for “Spots and Dots” on your creations this time!  We look forward to seeing your take on this one!

For my card, I decided to keep it rather simple as I needed a card for my brother’s birthday this past weekend, so I didn’t want to add too much to it:

Vicki-CCT604

This card is using items from the Simon Says Stamp Sweet Birthday Limited Edition card kit which has since been sold out, but I know that you can still purchase a few of the items that were included in the kit.

I started out by taking the SSS Celebrate stencil from the kit and spread on some Deco Foil Transfer Gel over a white piece of cardstock from the kit and let it completely dry before moving on.  After it was dry, I took the Rainbow Shattered Glass transfer foil sheet and put it through my laminator.  It looks so pretty and shinny with a wow factor to it!  I cut this piece down and layered it over a black scallop square die cut panel.  I then layered these pieces over the green colored Tim Holtz Metallic paper from the kit.

For the square card, I used a black top folding 4.25″ black card base and then layered another piece of that green metallic paper over it.  I took a ‘dotted’ piece of paper from the Honey Bee Over the Rainbow papers (included in the kit) and layered it over top of the metallic green.  Then I added my foiled balloons panel over this.

Lastly, I took the sentiment from the Simon Says Stamp Sweet Birthday stamp set and white heat embossed it over a piece of black cardstock that I trimmed down to a banner and popped up over the card with some foam tape.

Vicki-CCT604-flat

I really didn’t want to add too much more to it as it was for a male and I think with all of that foil and shine, it really didn’t need much else!  I think it’s fun, simple and really cheery looking especially with that foiling done.

I was able to pop this in his door before we left for the weekend and he let me know that it brightened up his day, so that was great to hear!

I know that I’m getting this fun kit out again very soon as I am in need of another birthday card to send to someone that needs a good birthday cheer and I’m happy to do it!  Besides, this kit looks to be so much to play with for sure!  🙂

Be sure to join us over the Cute Card Thursday Challenge this week!  Thanks so much for stopping in and I’ll see you soon!

**Please scroll down if you care to see some personal photos of our recent trips!**

Challenges:

  1.  Pammie’s Inky Pinkies – PIP1941 Anything Goes
  2. Crafty Cardmakers – Sparkle
  3. Through the Craft Room Door – Anything Goes
  4. A Bit More Time to Craft – Anything Goes
  5. Watercooler Wednesday – WWC243 Masculine Anything GoesWWC243 - Heidi's Masculine Anything Goes Challenge

**Below are some photos and details of our recent trips if you’re interested!**

Now I wanted to be sure to share some photos with you as promised from hubby and my last two weekends out and about with our shenanigans!  LOL

20191005_112400

The first weekend in October we visited Hannibal, MO and visited the Mark Twain museum and even went for a tour in the Mark Twain Cave!  It was very interesting!  You couldn’t be claustraphobic as there were a few tight areas in there!  I didn’t get any photos of the cave, but it’s so amazing in person!

This photo above shows us after we came back down from seeing the Mark Twain Memorial Lighthouse.  As you can see there are several steps to get up there, but what you don’t see is how many steps we took just to get to the point of where we are in the photo too! Whew!

20191005_131204

My husband finally decided to take me on that cruise…along the Mississippi River that is! LOL!  They had a Mark Twain Riverboat tour that we took and it was a fun boat to check out along the river while listening to the stories from the captain.

20191005_175043

So while listening to the stories from the Captain on the riverboat cruise, we heard about the story of “Lover’s Leap” and so we decided to investigate it before we left.  In the background you can see a view of the Mississippi River.  It was pretty up there and a long way down!


So we came back home for some “downtime” and to unwind before going out this last weekend for another trip near the Starved Rock Park area:

20191012_091448

We decided to get going in the morning but it had really cooled down over night and we knew starting out we would need our heavy coats.

And all I can say is that the photos do not do justice to what it was actually like over here.  It is absolutely gorgeous!  The photo above is our “lowest level starting point” during our ‘hike’ and that is the Illinois River behind us.

20191012_092120

We came through the Visitor’s Center and briefly went through the small museum and started going through some of the trails.  They seemed to wind all over the place with many different areas to go to!

20191012_111949

The main trail going straight was a slow incline and then several stairs to go upwards to where the top of Starved Rock was.  Here we are at the top along with tons of other people.  That is the Illinois River behind us again.  This was later in the day as you see the sun shining on us and getting warmer.

20191012_114445

And here we are with this gorgeous feature behind us among the trees where shelves of rock walls lay and water running down.  It had warmed up enough for me to take my heavy coat off while walking around.  I think we look more serious as we were trying to capture the pretty view behind us.  LOL!  Nothing like seeing it in person of course!  (I just wish I was able to do more than what we did, but was still excited about what we did accomplish!)

We wanted to get up the next day and try to walk around a small town festival going on along with catching a tour to the Reddick Mansion later that day before we left, but we weren’t able to get there and had to get back home. (I will try again another day.)

This was fun to just get out and enjoy nature especially this time of the year.  I look forward to many more fun little trips in the future…especially with the love of my life!

Thanks so much for stopping in and sharing a bit of myself with you!  Wishing you a beautiful day friends!

Projects with Patterned Papers!

Hello friends!

I have sort of went a little “crazy” with the papers, but there are lots of fun tips, techniques and even a tutorial below to help you use those left over pieces you don’t want to throw away from your patterned papers!  I ALWAYS have left over pieces and I know you do too if you’re a hoarder like myself! LOL!

Here’s what I’ve been up to:

Vicki-BM-PatternedPapers-Sept4bloghop

I have used the same Patterned Paper Collection for each one of these designs and I love how they all turned out different too!  I’ve used a Bold Rainbow Paper Pad for all of these designs.  I’ve made a couple of cards with some fun techniques and I’ve also used the same papers to decorate my two Post-It Note Holders too.

Be sure to grab a beverage and stick with me for some paper crafting fun!

Vicki-BM-PatternedPapers-Sept4bloghop-Smile

Starting with this card, I thought it would be fun to take my left over strips and create a fun background for a card!  I also tend to hoard those tiny pieces of Glitter paper too!  So I’ve cut some very thin strips and placed those between the Rainbow paper pieces too.

How I’ve done this is simply by taking a piece of white Cardstock (you could even use copy paper to keep thickness down!) and attaching each strip down laying it right up next to each one as I go.  When I’ve covered the piece, I took a rectangle die cut and cut out the panel so that it all looks uniform even though all of the strips I used were uneven to begin with.

I’ve finished off my card by attaching my paper pieced panel to a top folding A2 sized black Cardstock base and then adding the fun sentiment that was heat embossed with white EP over a piece of black Cardstock.  I took some white ink and rubbed some over it and added some stitch marks along the edge with a white gel pen for a sort of chalkboard look.

Vicki-BM-PatternedPapers-Sept4bloghop-Birthday

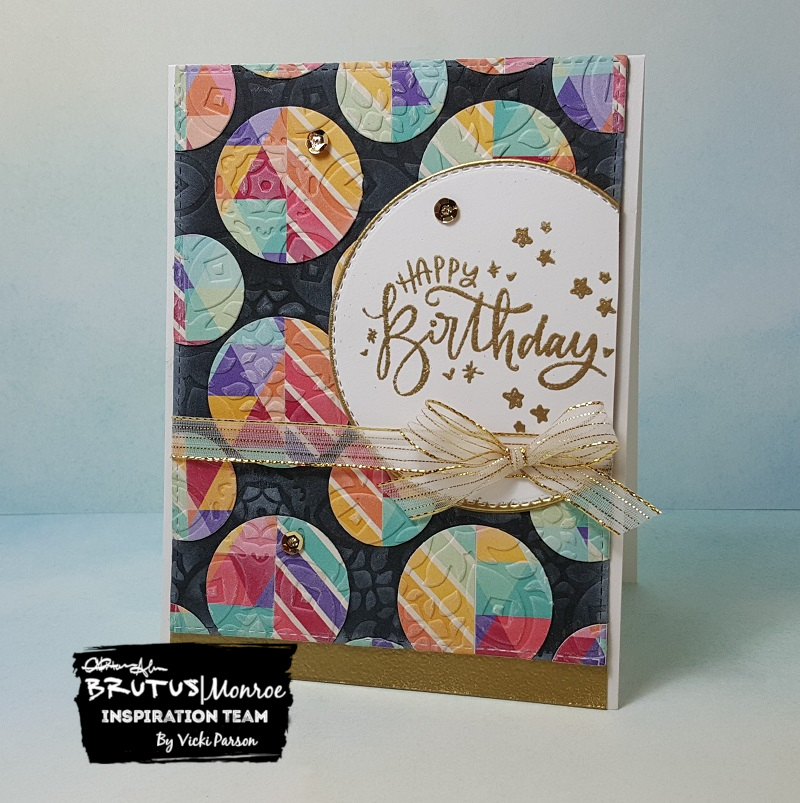
Here’s another card I made actually using more of the strips from the Bold Rainbow Paper Pad.  I took the strips once again and adhered them to a piece of thin paper this time and lined up two different patterns next to each other.  I then took a circle punch and punched them out and then attached these in a pattern over a black card front piece.  I took a rectangle die and cut it out for the background.

So to give it a bit of texture and sort of a “quilt” pattern look, I took a Vintage Tapestry embossing folder and embossed the background too.

Then for the sentiment, I took and heat set it with Gilded EP.  I also added a few of the tiny stars from the set with it and then cut the whole thing out with a stitched circle die.  I also took the Embossing Ink and rubbed it around the edges of the circle and then heat set it with the Gilded EP.  I attached the circle over the background panel and cut off the part hanging off the side with my Scissors.

You will also notice at the bottom of the card that I took a strip of cardstock and covered it with Embossing Ink and heat set that strip with the same Gilded EP.  I attached that to the bottom of a white A2 sized top folding card base.

I then added a gold ribbon around the paper pieced background and attached the bow.  Then I just added this background piece over the white card base.  I finished it with some gold sequins and added glitter in the center of each one.

Vicki-BM-PatternedPapers-Sept4bloghop-PostItNoteHolders

I still wasn’t finished after the cards, so I made a couple of Post-It Note Holders too!  You will notice the one with the flower on the right, I’ve also used some of these papers to create a dimensional flower with it too!

To create the flower, all I did was punch out three different sized scallop circles, then used my scissors to cut into each scallop and creating petals that I lifted up for dimension and then layered each one on top of each other and added a glittery brad in the center.  I also used some black Ink to sponge around them.

The papers were cut with a scalloped square die cut for both of them and then layered them over a piece of black Cardstock.  I die cut a piece of white Cardstock with a stitched circle die and then sponged around the edges with some orange ink.  I then die cut a piece of black cardstock with a stitched scallop circle die for layering.

For the sentiment on the left holder, I took the sentiment and heat set it with black Sparkle EP.

The base of the Post It Note Holders were made using some orange cardstock.

And if you’d like to learn how to make one of these Post It Note Holders, then check out the step-by-step photo tutorial below:  (measurements shared in photos)

Vicki-PostItNoteHolder-Tutorial

Vicki-PostItNoteHolder-Tutorial1

Vicki-PostItNoteHolder-Tutorial2

Vicki-PostItNoteHolder-Tutorial3

Vicki-PostItNoteHolder-Tutorial4

Vicki-PostItNoteHolder-Tutorial5

Vicki-PostItNoteHolder-Tutorial6

Well that’s all I have for now! 🙂

Thanks so much for stopping by today friends!  See you real soon!

Challenges I’d like to enter:

  1.  Cardz 4 Guyz – Celebrate
  2. Tuesday Throwdown – Stripes
  3. CCEE Stampers – CCEE1935 – Encouragment (sending to a friend)
  4. A Bit More Time to Craft – Anything Goes
  5. Papercraft – Handmade/Stamped flowers
  6. Love to Scrap – #125 Anything Goes
  7. Scor-Pal – Sept More Than One Fold “Back to School”

Conservatory of Quotes + video!

I had SO MUCH FUN with my creation today and I can’t wait to share it with you…

*To check out the full details on how I put together this card and how I created the rainbow background, be sure to check out this video below!  (CLICK HERE to view it on You Tube.)

Vicki-Brutus Monroe-ConservatoryofQuotes-JuneGDT

One of my most favorite products is watercolor and all of the really cool effects you can get with them!  This is what I have used throughout the card here from the background to coloring the floral image.

Speaking of floral image, isn’t it gorgeous?!  It not only has this gorgeous floral image, but it has some really awesome quotes to go with it!

For my card, I first started by masking off an area with some purple tape on some paper that was large enough for my floral image.  Then I made the background with some help from a ruler and baby wipes.  I used a stitched rectangle die, added the sentiment at the bottom of my rainbow panel and made some splatters.  I mounted this piece onto an A2 sized top folding black cardstock.

Vicki-Brutus Monroe-ConservatoryofQuotes-JuneGDT-close

For the image, I had actually started out doing this card in one direction and then totally went a different way.  But the image was stamped with black ink a couple of times over the paper and colored with Aqua Pigments using a waterbrush.  I cut an entire image of one and attached it over the rainbow background with liquid glue and then I fussy cut just the flowers and popped them up with foam tape over the full image.  I added some of that gorgeous shimmer with the Aqua Pigment and then finished off the design by adding some clear sequins over it.

Vicki-Brutus Monroe-ConservatoryofQuotes-JuneGDT-flat

I hope you’ve enjoyed my card today as I had so much fun making it!  I can’t wait to create another project to share with you!

Challenges I’d like to enter this card for:

  1.  Stamping Sensations – Show Your True Colors
  2. Get Creative – Anything Goes with optional twist: Favorite color combo
  3. Through the Craft Room Door – Anything Goes
  4. Artistic Inspiration – Anything Goes
  5. Crafting By Designs – Anything Goes
  6. Alphabet Challenge – “F” is for Flowers
  7. Simply Create Too – Anyting Goes with optional twist:  Lots of flowers
  8. Rainbow Card Challenge – Neon Rainbow0619 Neon Rainbow

Rainbow Shaker Birthday!

Hello friends!  Yay!  It’s Friday and I thought I’d share this happy shaker card that I made for my mom’s recent birthday she had.  (Yes, I kept this one a secret until I gave it to her!)

Vicki-MFT Birthday Bear Rainbow

I saw over at My Favorite Things “Birthday Project” Challenge was a “rainbow” theme and I thought this would make for a happy and fun birthday card design!  So I pulled out the MFT Transparent Triangles Background stamp (now retired) and heat embossed it with white EP over some Bristol Smooth Watercolor paper.  I went to work with my rainbow background and sponged several colors of Distress Oxide ink in rainbow form over the heat embossed background for a “resist technique”.  I spritzed some water over it and my sprayer went a tad bit “dropy” and I ended up with a weird large droplet pattern, but I decided I wanted to keep it anyway, I liked it.

So to make sure that my shaker balloon was going to line up with my bear, I needed to stamp, color and fussy cut out this bear from the Beary Special Birthday stamp set.  I needed to fussy cut it out because the coordinating die cut would also cut out the balloon from the image, and I didn’t want to include it as I was making my own!  I’ve also white heat embossed a senitment from the same stamp set and cut it out with the Essential Fishtail Sentiment Strips.  I also took the Mini Balloon Shaker Window & Frame Die-namics to cut out all of the pieces that I needed for the balloon.  (I used the fussy cut out bear for placement to see where I needed to die cut a hole in the background for the shaker area.)  Before attaching the bear down, I also took some green cardstock and cut out a border with the Grassy Fields Die-namics.  I sponged the edges with green ink and took a Copic marker to give a shadow around the bear.  So after I placed my “balloon hole” where I needed it on the background, I took the rainbow sequins to place inside the Mini Balloon Shaker Pouches and added a piece of black cardstock for the background, which was placed over an A2 sized white top folding card base.

Vicki-MFT Birthday Bear Rainbow-close

Here’s a closer look at the bear and how I’ve got him colored in.  I forgot that in addition to the rainbow sequins I had, I put some tiny star sequins in there as well.  At first I thought I had went a bit too dark for coloring the bear, but I like how he blended out and I think he really stands out on the rainbow background and doesn’t get lost with the black accents on the card.  I took a white gel pen to his cheeks and added some shimmer to his present with a glitter brush pen.  (My mom likes the color red, so I purposely made the present red).

Vicki-MFT Birthday Bear Rainbow-flat

Here with the card laying flat, you can better see the shaker bits on the inside of the balloon and how they really stand out against the black balloon background.

I think I got a smile and it was passed around for the shaking.

Hope you’ve enjoyed my card today and I thank you so much for stopping in!  Wishing you a very happy and rainbow filled weekend too!  🙂

challenges:

  1.  MFT Birthday Project – Rainbow
  2. Creative with Stamps – BirthdayCWS#37Birthday
  3. Crafting By Designs – Anything Goes
  4. Little Red Wagon – “Shake It!”
  5. Always Fun – Birthday

Another Pot O’ Gold!

Hi there friends!  I guess I am really feeling the luck of the Irish this week!  I have another fun St. Patrick’s Day themed card to share today:

Vicki-SNSPotOGold

My card here may seem a bit simple, but it has a few really fun added extras to really make it shinny and glittery!  I have used one of the March releases from Sparkle N Sprinkle called Lil Leprechaun (Digital only stamp set).   I took the pre-colored versions of the set and arranged them in a blank Word.doc for how I wanted it to appear on my card front.  I used the clover images and resized them to fit around the bottom of the pot of gold area and then placed the sentiment where I wanted it off to the side.

I then printed it out and then cut it out with the Nuvo Basics Rectangle dies.

I used a couple of Copic green markers to make the “blades of grass” next to the pot of gold and clovers.  I also used some colored chalk to sponge in some colors for the rainbow behind the pot of gold.

Vicki-SNSPotOGold2

Here you can also see on the panel where I’ve taken some Super Thick Gold EP and sprinkled some in the corners of my image panel and then heat set it from underneath.

I also took a Nuvo Precision Glue Pen to add some “dots” in the center of the clovers and then of course used the SNS Shamrock Glitter to go over them!  I also covered the coins in the pot with the glue and sprinkled some Champagne Glitter over them for some sparkle!

Vicki-SNSPotOGold5

With the same SNS Champagne Glitter that I used on the coins in the pot, I also took some SNS Sticker Paper and covered an entire panel with it and burnished it in!  The shimmer and glitz on this is stunning in person and really sets off the card!  I’ve also used the Glitter Brush to take away the excess glitter particles and it’s a must have for clean up too!  (Instead of clinging to the brush, it repels it away!)  These sheets are somewhat thin, so I made sure that I’ve added some layers of cardstock in between this glitter panel for stability to the card.  (Keep this in mind if you are using the sticker paper for this idea.)

Vicki-SNSPotOGold-flat

I tried to capture some of the sparkle in the photo, but it really looks brilliant when you are holding it in person! 🙂

I hope you’ve enjoyed my card today and I really appreciate you stopping in!!

If you happen to use any of the links in this post, please be sure to use my special discount code below at checkout for 10% off your order:

SnS discount code badge

Challenges I’d like to enter this card for:

  1.  Crafting With an Attitude – Anything Goes
  2. Creative Moments – Anything Goes
  3. QKR Stampede – Anything Goes #338
  4. Creative Fingers – Anything Goes
  5. Pammies Inky Pinkes – Anything Goes PIP1910
  6. Not Just Cards – Anything Goes


Whimsy Stamps St. Patrick’s Day Celebrations Week!

Hello friends!!  I’m so happy that we are into March as I hope to be feeling warmer temps and “seeing the green” very shortly over my way!  I’m more than ready for that!

In the meantime, how about we celebrate with some inspiration and perhaps a fun event you might like to be apart of?!  Whimsy Stamps is having this fun week of St. Patrick’s Day Celebrations over in their Facebook Group – Check it out HERE!!

Vicki-WSPatricks Day Celebrations

I have made this super fun (mostly green) card especially for this fun event with the really adorable Little Leprechaun digital stamp by Crissy Armstrong.  I thought he was so cute sitting atop his pot of gold with his new winged friend there!  He was so fun to color up for this card! (See the Copic list below!)

For the card, I started out with some watercolor paper and I’ve used some Aquapigments (liquid watercolor from Brutus Monroe) and some extra water for the background of my card, then I cut it out with the Whimsy Stamps Hand Stitched Nested Rectangle Dies.  I also used this to cut out the leprechaun image too.  I’ve used some gold mirror cardstock to mat a layer of it behind the image panel.

I thought it would be fun to add a rainbow behind the image panel, so I took the WS Kinetic Curved Hills die set and cut strips with the straight curve die in the colors of the rainbow and added the strips over the background.  Then I attached the layered image panel and took the WS No-See All Seasons Tree die set to cut some grass and mushrooms to attach at the bottom of the card.  I used a white gel pen to color the spots on the tops of the mushrooms.  I also sponged some ink over all the pieces.  One of the sections of grass was popped up with foam tape.  Lastly I took an older sentiment from Whimsy Stamps and made a banner that was popped up with foam tape over the design.  I then mounted the entire card panel over an A2 top folding white card base.

Vicki-WSPatricks Day Celebrations-close

Here you can see a close-up view of the coloring.  I have used the following Copics to color in the image with:

  •  pot, hat band, stockings, coat trims & dragonfly body:  C8, C5, C3
  • Leprechaun outfit:  C09, C07, G05, G03, Y11, Y13
  • Leprechaun gold trim and coins:  Y17, Y15 (layered over with gold gel pen)
  • hair, skin, dragonfly wings:  E09, E23, E21, E00, E000, Y11, R20, R00
  • clover on hat:  YG97, YG95
  • outline of image and “dots” :  C3, C1, C0, Y11, gold gel pen

You can also see the rainbow has some shimmer on it.  This is where I took a Spectrum Noir clear glitter brush pen to go over it.  You can also see a bit of shimmer from the Aquapigments in the background…they’re really stunning and I’ll be using them again in the future, so be sure to check back!! 🙂

Vicki-WSPatricks Day Celebrations-flat

I wanted to bring out some more of that gold with the mirror layer behind the leprechaun, so I brought some gold sequins into the layout and filled them with some gold Stickles.  When you hold this card up to the light, the whole thing really shimmers and sparkles!!  I loved how it turned out!  I hope you’ve enjoyed it too!

Thanks so much for dropping in today and I sure hope that you will be joining with us over in the Whimsy Stamps Facebook Group for the St. Patrick’s Day Celebrations this week!!  Would love to see YOUR mostly green creations too!!  🙂  Don’t forget there will be prizes, inspiration and fun!!  Go check it out!

Here’s the Whimsy Stamps products used on my card today:

little_leprechaun_color_display_1024x1024

handstitched_20rectangles_20die_20display_1024x1024

Kinetics_Curved_Hills_Die_Set_1024x1024

No-See_Tree_Climber_Die_Set_1024x1024

WS-Copic display

Challenges I’d like to enter this card for:

  1.  Double Trouble – challenge #23 – “Thing 1“:  The Wearin’ O’ the Green “Thing 2“:  Collaboration with Heart 2 Heart Challenge (entered below!)  “Thing 3“:  Include a golden touch (used gold mirror cardstock and sequins filled with gold Stickles!)shamrock border Thing 1 with BalloonsKilt wihTHING 2pot of gold and rainbow and Thing 3 with Glasses
  2. Heart 2 Heart Challenge – Greens, Rainbows & Pots of Gold (3 part challenge)Double Trouble - Green Badge
  3. Daisy Chain – Spring is in the Air!
  4. Creative Inspirations – Spring Greens
  5. Mod Squad – Green, Green Everywhere
  6. Crafting By Designs – Anything Goes
  7. Three Amigos Blog Hop Challenges – Rainbow (edited to add)Rainbow