Hello crafty friends! Happy Friday to you! Hope that you’re having a great Summer and a great start to your July month. We’ve been busy doing lots of things and I got to visit my new grandson again which of course was wonderful!
I’m swinging in today to share a new challenge over at the Alphabet Challenge Blog! Our next letter is ‘G‘ and the hostess has chosen “G” is for GIRLFRIEND *Remember that this is a bi-weekly challenge, so you have two weeks to enter* I hope you will find some time to play along! Here’s what I’ve created:
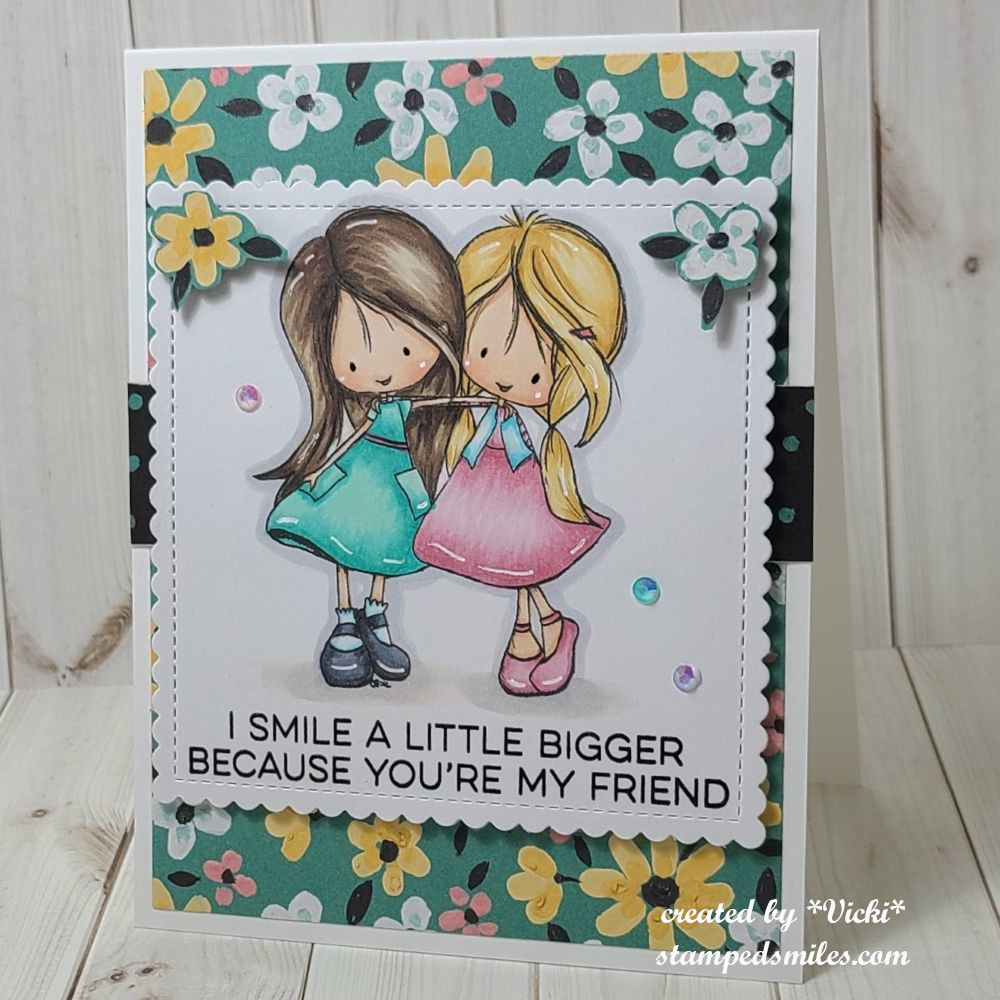
Isn’t this the cutest image! I found this adorable image called “Emmy and Wryn-BFF” from the Tiddlyinks store on Etsy. I have always loved this artist’s images and I hope to be coloring up more of them soon!
I colored the image with Copics and then black heat embossed the sentiment at the bottom and cut out the entire panel with a stitched scallop square die. (P.S. Have you heard that “My Favorite Things” has closed?) Both the sentiment and die came from MFT.
I had a package of these pretty papers from another crafty friend laying around, so I pulled them out to use for this card. I loved the flowers, so I cut a few of them out and popped them up in the corners with foam squares. I added another strip of the papers in the center of the design behind the image panel that was also popped up with foam tape.
I finished with details on the images using a black gel pen for their eyes and a white gel pen for highlights. I added some colored gems over top.
I hope you’ve enjoyed my card today and that you’ll stop on over to the challenge blog to see what the rest of the team has come up with. Thanks so much for dropping in!
Hello friends! The weather has been really nice over my way so I’ve been taking advantage of it by enjoying the outdoors before it starts changing into more chilly temperatures. All of the prize winners have contacted me and the packages have all been sent out. I have received notice that the U.S. winners have gotten their packages and hopefully the overseas will be arriving soon. My thoughts are also with those that were affected from Storm Ian and hope for healing and recovery as soon as possible.
Although it’s been a while since I last posted, I have been working on some things for SWAPs and a few other cards that I had created as well to share with you.
please click on the photos below to see them close-up
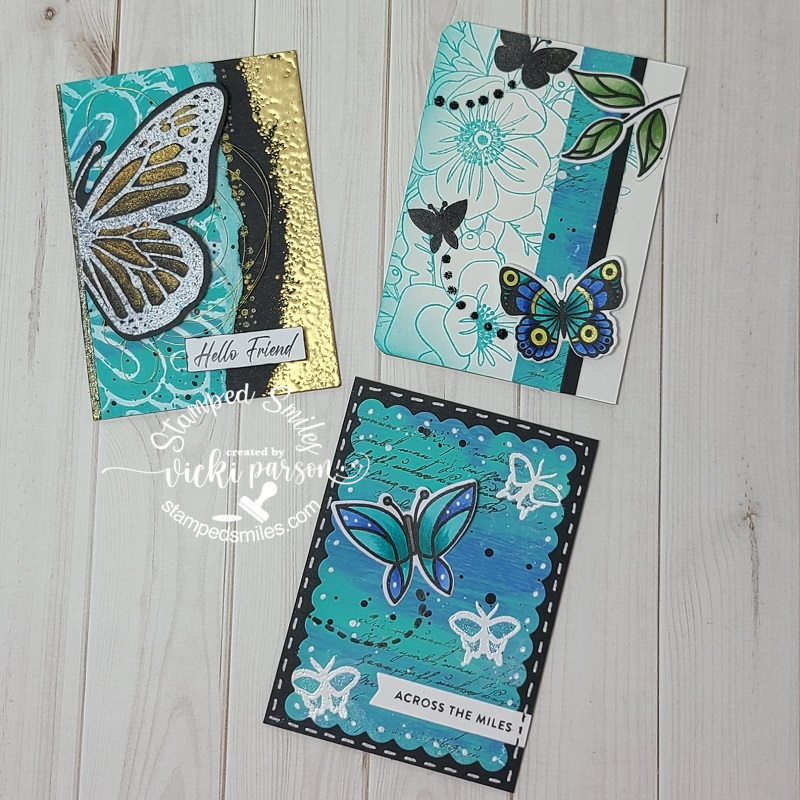
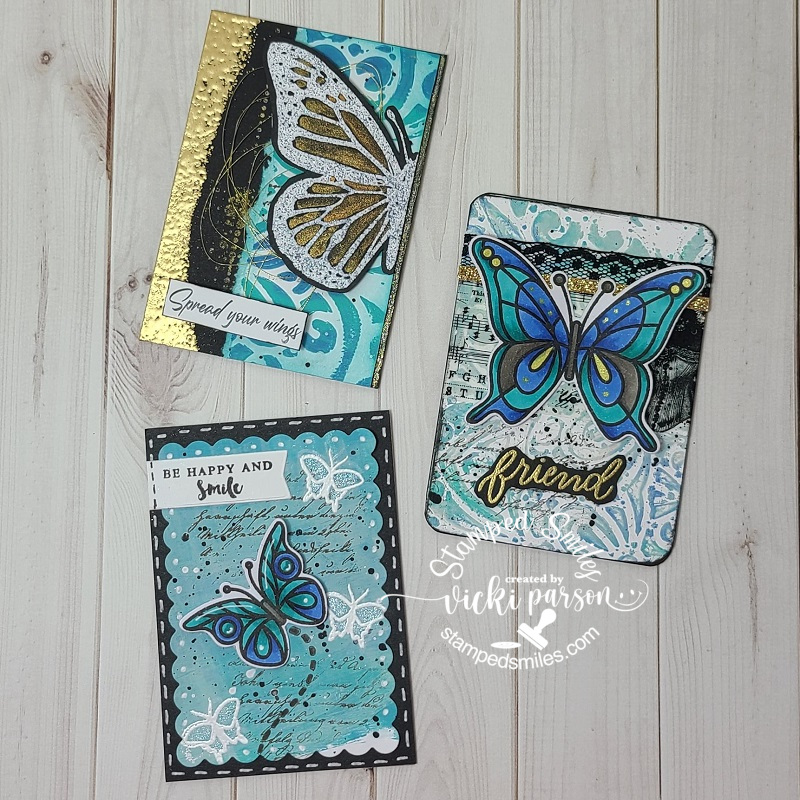
Within a FB Group that I’m in, we could choose to join an ATC SWAP with the theme of “Friendship” and these are the cards that I had created. I swapped with two others and then kept one set of three for myself. I was excited because this is the first ATCs I’ve sent overseas and really enjoyed making the collection. I thought the butterfly theme with similar colors would work keeping the “Friendship” in mind…
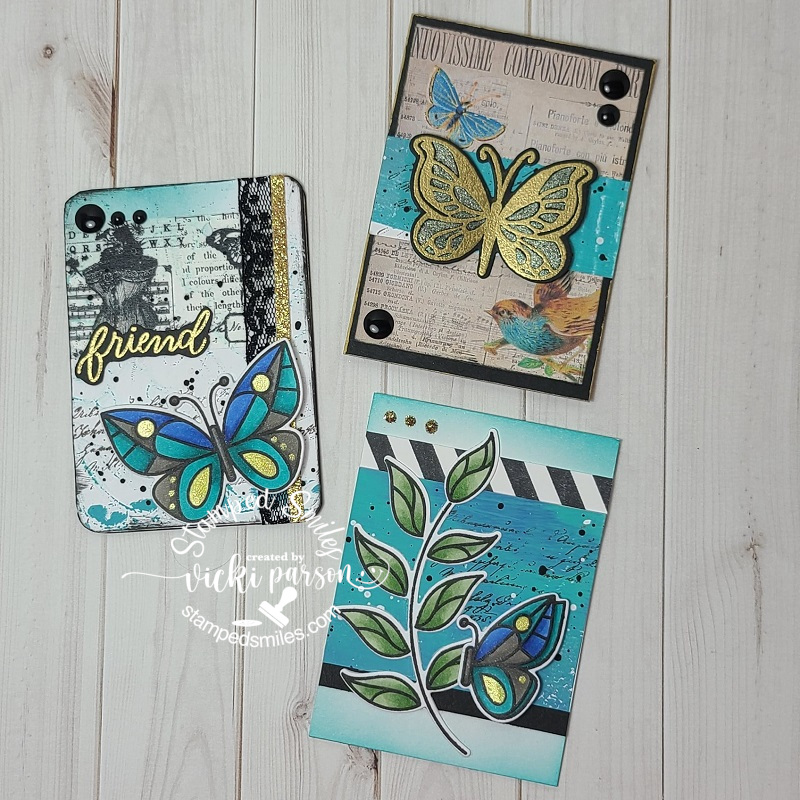
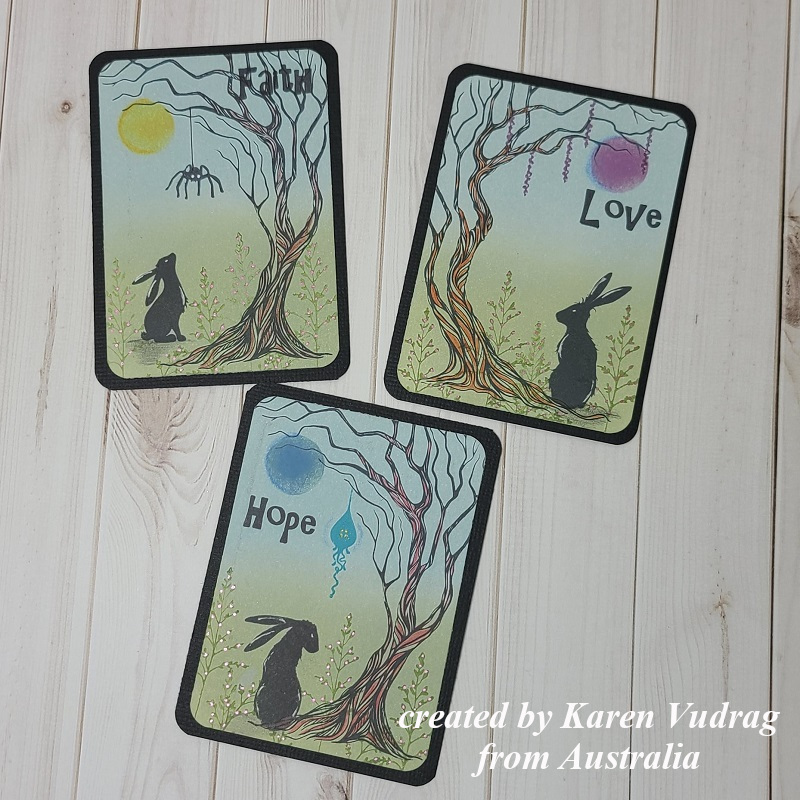
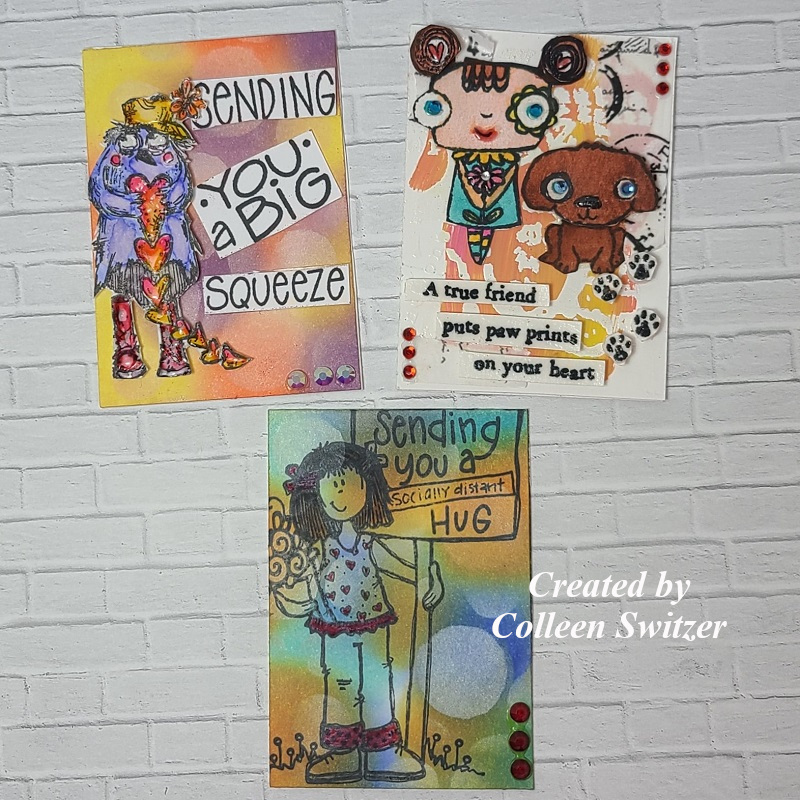
And then below are the set of ATCs I’ve received from my SWAP partners in return. The first lady sent her ATCs from Australia and the other lady was from the UK I believe. Love them and was excited to receive them to add to my book.
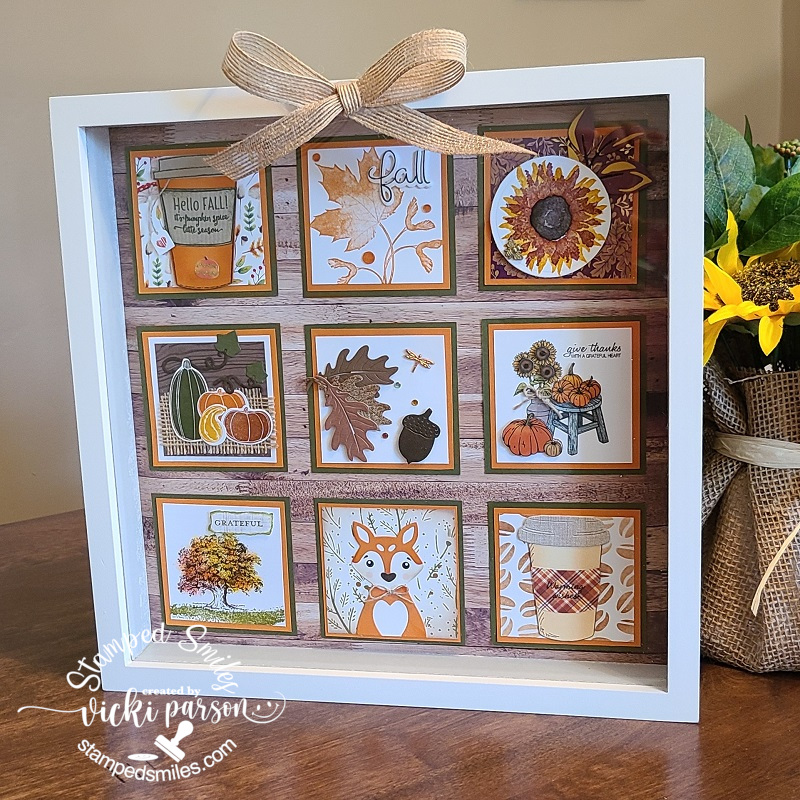
I was also involved in another “StampedSampler SWAP” making those squares like I had done with my Summer one if you remember that with my friends Patti, Shirley and Donna. This time our squares were the theme of Autumn/Fall using the Stampin’ Up! colors Pumpkin Pie and Mossy Meadow. It’s so fun to see them come in and then put it all together in the frame! Here’s how mine finished out:
For my Sampler frame, I used some different colored woodgrain pattern paper to attach the squares to and this frame is a bit different than my Summer Sampler (Check it out in THIS POST if you want to see that one.) It can stand on a table surface or you can hang it up. I also decided to add a burlap bow at the top of the frame using a hot glue gun.
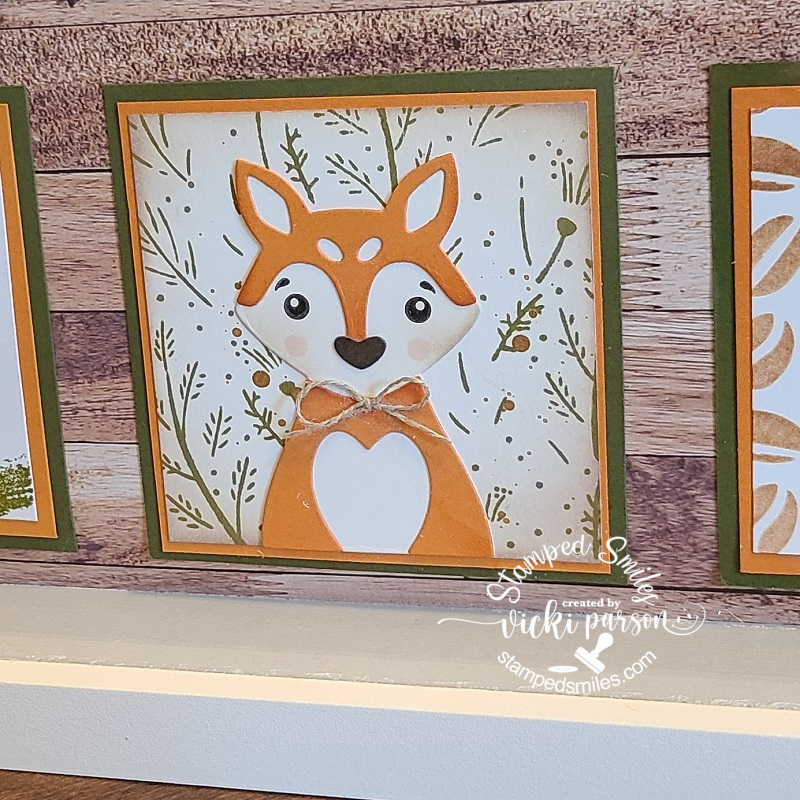
This is the Sampler Square that I had made using the adorable fox from the Taylored Expressions Woodland Squad Die & Clear Stamp Combo set. The background was stamped with the TE Four Seasons Stamp & Stencil Combo set using ONLY the background stamp in one color. I then using some gold acrylic paint to splatter over it. I also added a twine bow to the fox. I believe we’re going to be doing another one for Winter too…stay tuned!
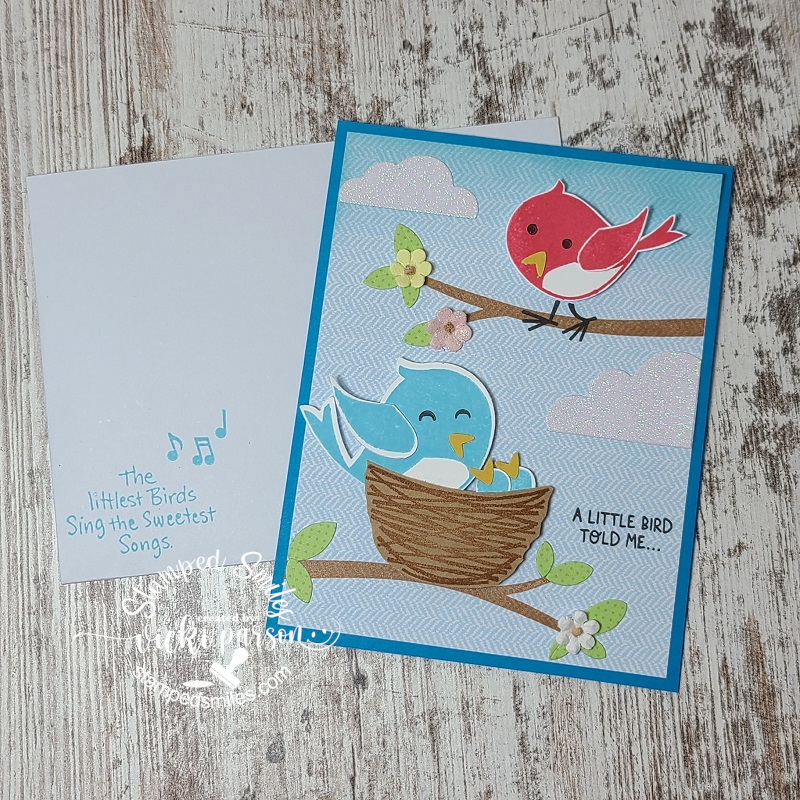
My friend Patti had also sent me an extra card kit from one of her classes along with her SWAP square, which I thought was so nice…so I had some fun putting it together as I don’t have this set which I believe is a Stampin’ Up! one.
The card kit had all of the pieces in it along with the stamped birds cut out, the stamped branches and sentiments (even on the included envelope) along with cut glitter clouds and flowers! There was a sheet with photo and instructions so I just followed along except I die cut some leaves for the branches from a piece of scrap green paper I had. Now I have a cute little birthday card ready to send out, so thank you for the fun Patti!😉
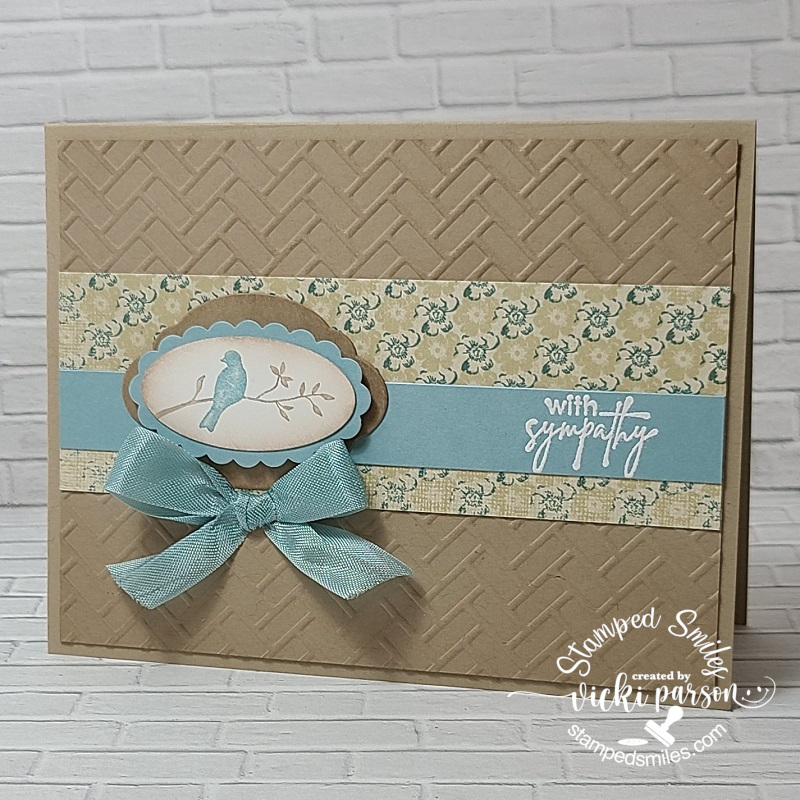
And speaking of birds and Stampin’ Up!, I had to make a sympathy card for someone that lost their pet bird. I was looking through my stash and found an older Stampin’ Up! set with a bird silhouette which I thought would be good for a sympathy card like this. I was inspired to pull out more of my older Stampin’ Up! stash to use so I used some old punches, ribbon and paper for my card as well.
I hope you’ve enjoyed the inspiration today and I thank you so much for stopping in! If you have any questions about my post, please let me know. Have a great day and see you soon!
Hello friends! I think we’re getting closer and closer to Spring! I sure am ready for it, how about you? Let’s welcome the warmer weather and pretty flowers to come!
I had previously made a winner/top 3 for a challenge I had entered which was exciting to have also won a place to be a future guest designer for one of the challenges too.
So this month, I’m very excited to be joining my friends over at the Cheerful Sketches challenge blog as a guest and they always have a beautiful sketch along with lots of inspiration for it each month! So please be sure to check them out and play along if you can! Here’s the lovely sketch they’ve provided for me to work with this month:
This is a very nice sketch and open to lots of different interpretations as well, so I had fun playing with it along with an image that was provided to me from a current sponsor for the challenge and here’s what I came up with:
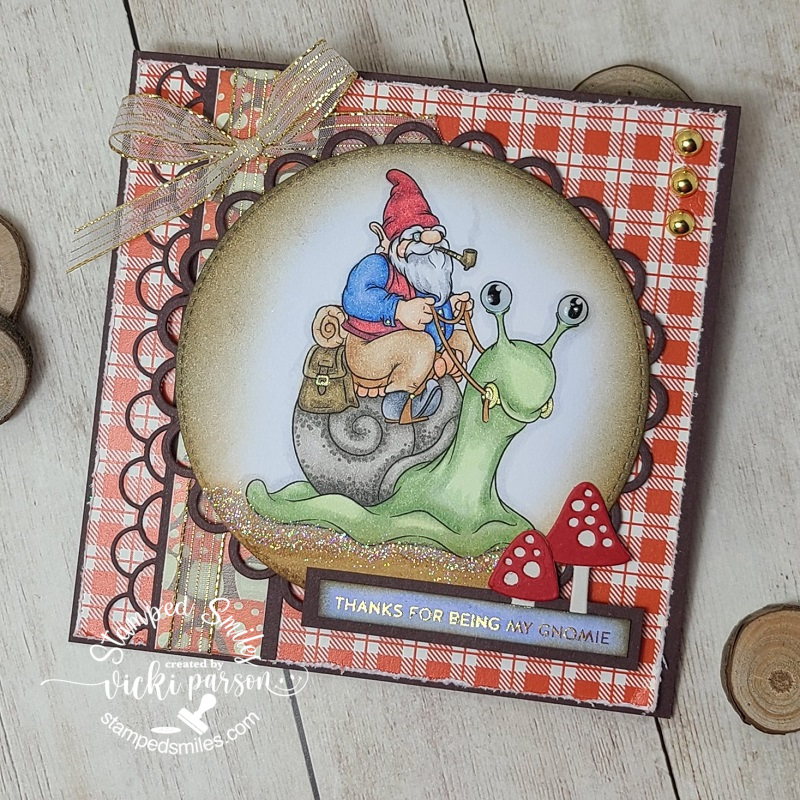
Everyone loves the gnomes and this one is too cute riding his snail friend! I’m using the “Grumblebonce Rides Again” from Dr. Digi’s House of Stamps for my card today. I’ve colored him up with Copic markers, added details with gel pens, glitter under the snail and glossy accents on the snail’s eyeballs. I die cut the image with a stitched circle die and ink blended around the edges before attached to another loopy circle die cut from brown cardstock.
I found some fun papers fitting for the image with red plaids and a strip of mushrooms that I’ve attached over another loopy die cut strip I’ve had in my stash forever. I wrapped some gold ribbon around it and attached to the red plaid papers that are attached to a 5″ square top folding brown card base. Before attaching the red plaid papers, I used a distress tool to rough up the edges. I’ve popped up the image with foam tape and added 3 gold enamel dots in the upper right corner.
With the card now laying flat, you can better see some of the shine from the sentiment at the bottom. I found these fun gnome style sentiments that can be foiled. So I used some gold foil and ran the strip through my Minc Machine. I sponged some blue and brown inks over it and then added some die cut mushrooms behind it and layered a piece of brown cardstock to layer behind it.
I placed the mushroom sentiment at the bottom with a portion of it with foam tape and the other parts just glued to the circle sentiment panel. I think it turned out pretty cute and I had fun coloring it up!
So please be sure to check out the challenge and come play along!
Thanks so much for dropping in and I’ll see you soon!
Hello friends! It’s getting closer towards the end of the month and so it has motivated me to get going on some challenges that are about to end soon. So I’ve grabbed my supplies and had a fun play…
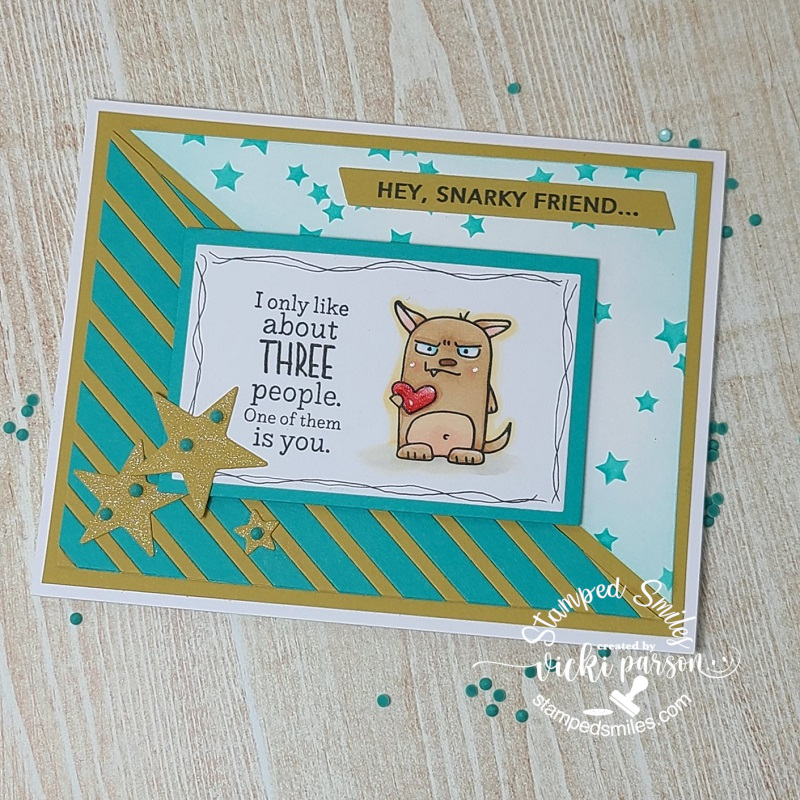
Tee hee!😁 This one makes me chuckle and I think it would be so fun to send to a special friend for Valentine’s Day or even at any time of the year! Most all of the products I’ve used for this come from Taylored Expressions. Along with many people, I do enjoy those “snarky” products they sell!
To start, I’ve based my card on a sketch for a challenge that’s about to end and worked with the Taylored Expressions Easy Strips 1/4″ and Easy Strips 1/8″ dies for the bottom right side of the card using the colors Blue Raspberry & Dijon cardstock. The colors are part of the TE Maker Challenge for January as well which is about to end too which is why this was my choice for this card. I cut the panel in half diagonal based on the sketch and used a white cardstock for the top right area and blended some TE Blue Raspberry ink with the TE Superstar Rotating Stencil. Layered these onto some Dijon cardstock which was layered onto the white top folding A2 card base.
For the image panel, I stamped the “TE Grouchy Grumplings” (Sorry, it’s been retired it looks like! LOVE that snaggle tooth! 😆) and the TE Shenanigans sentiment on the same panel layered over a piece of Blue Raspberry cardstock that was popped up with foam tape. The image was colored with Copic markers. I also stamped the TE Simple Strips-Snarky with black ink over a piece of Dijon cardstock that I cut out with the TE Simple Strips-Asymmetrical die and attached at the top right corner of the card.
To finish off the card, I die cut the stars from the TE Gathered Stars die from Dijon cardstock, glued over the card and then covered with a glitter brush pen. I also added some TE Tiny Diamonds over the stars to match the Blue Raspberry color of the cardstock. For the image panel, I used a black pen to doodle around the edges and then covered the heart with glossy accents.
Hope you’ve gotten some chuckles or inspiration from my card today! Thanks for dropping by! I’ll see you soon!
Hello friends! I hope that you’ve had a great weekend! The weather has really started to cool down over the weekend and I can feel the Autumn breeze in the air right now!
I’m swinging in today to remind you about our current color combo challenge over at {Cupcake Inspirations} and the second card I’ve made using the colors GREEN, PINK and LIME:
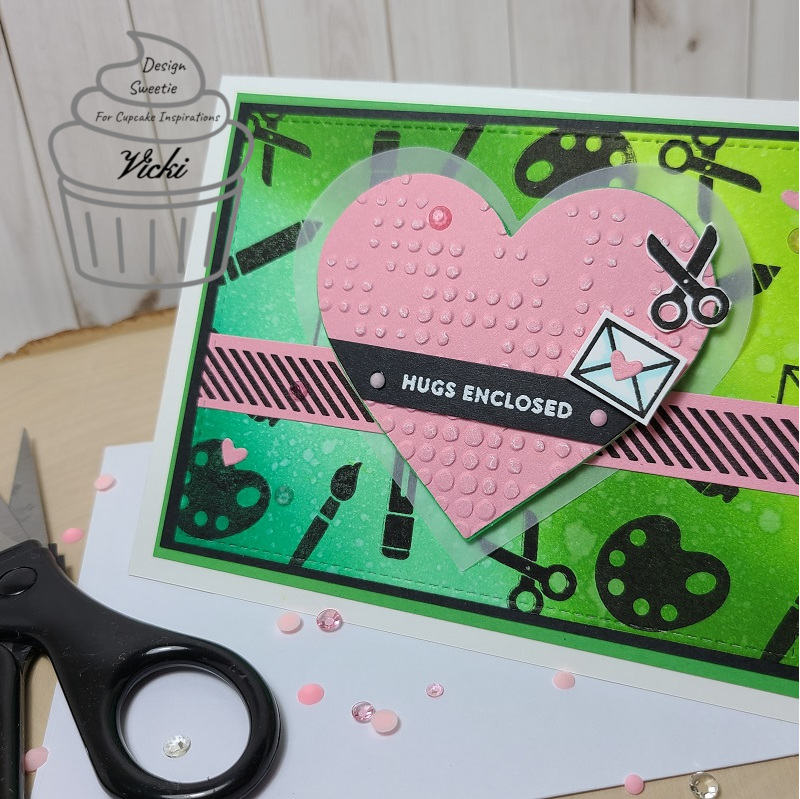
If you remember my card from last week, I had so much fun blending the green ink colors on the grass, I thought I’d continue with another panel of the ink blending on this background too! I also spritzed it with water and then once it was dry, I stamped the images from a Simon Says Stamp Crafty Friend stamp set with black ink. I’ve used the stamp set throughout the card with the cut out scissors and envelope accents and the strip across the pink piece too.
I did white heat emboss the sentiment from the stamp set over the black strip on the heart. I used just a set of Hero Arts Inifinity Heart dies to cut out the pink heart and another will vellum behind the heart and pink strip. The pink heart was popped up with craft foam and so was that little envelope over top of it. I did run the pink die cut heart through a Tim Holtz embossing folder and rubbed some white ink over it.
The blended ink and stamped background was cut out with a stitched rectangle die and layered over a black and then a green panel, which was then layered over top of an A2 sized top folding white card base. I finished the card with some pink die cut hearts and some Studio Katia Cupid’s Kiss Crystals. (So happy to have again pulled out an older card kit!)
Here’s a closer look at the images on my card. I just fussy cut the envelope and scissors WITH my scissors.😂 For the open areas in the handle of the scissors, I just took a small hand held circle punch to create the circle openings.
I have taken one of the pink hearts that I die cut for my background and used one over the tiny envelope on the heart. The crystals add a nice bit of sparkle to the design too.
I think this will be a nice card to send out to one of my crafty friends! I think maybe we could all use a crafty hug right now so maybe this will help! Thanks so much for stopping in today and I’ll see you again soon!
Hello friends! There is so much to “bee” happy about for sure! It’s been sunny out lately; it’s the weekend and I have some fun creations to share with you for the Whimsy Stamps June digital release today! 🙂
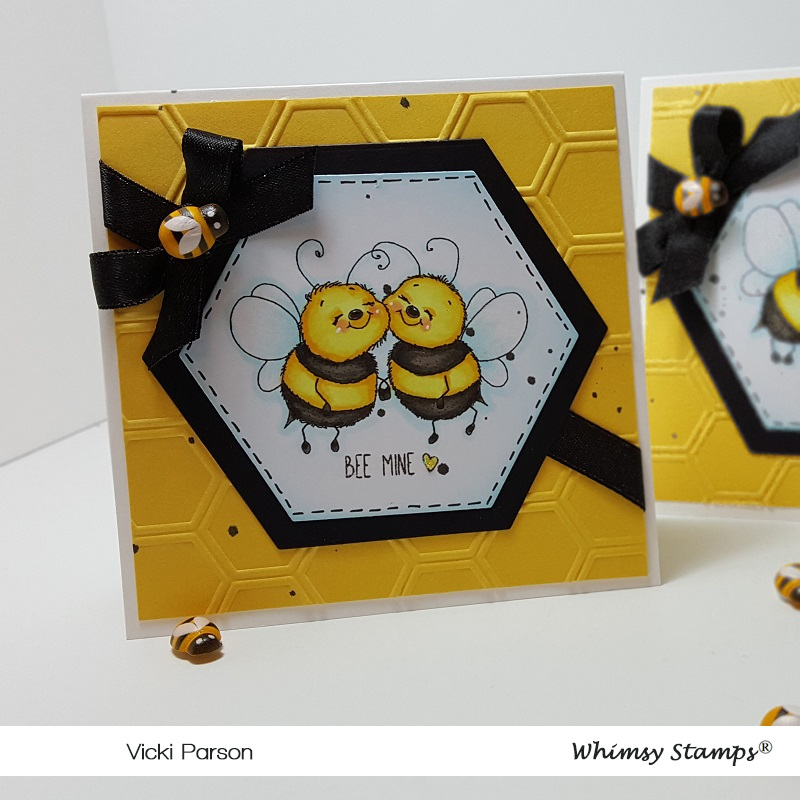
Check out these ADORABLE bees!! I have made 3 different cards because I just couldn’t stand not being able to color each one of these which are all included in this set! I have used Crissy Armstrong’s “Bee Happy” digital stamp set. This is a set that was previously released as a stamp set, but now available in digital format starting this month! Good news that you can now choose between either format you prefer!
I’ve sized each of these bees in the format to fit onto a 4″ square card design. I’ve cut them out with a hexagon die cut and layered another black piece of cardstock behind each one.
For the background, I’ve taken a yellow piece of cardstock slight smaller than the 4″ square top folding white card base and embossed it with a fun hexagon embossing folder. Before attaching them to the card base, I’ve added some black ribbon at an angle over it. I then attached the image panels and added the ribbon bow which I then placed a bee wooden accent to the center of each one.
The story with the black splatters actually came about from an accident I had! I opened up a black shimmer pen over top one of the cards and it had a leak in it! When I popped open the cap, it spilled all over my card!! OH NO!!! Obviously, I had all of my cards done at this point and I loved the way I had colored them….so I just decided to “go with it” and added some more splatters to each one. I actually like the way it looked after I completed it! They look like “busy bee’s” now! TEE HEE!
Here’s a closer look at the “couple bees” image. For each one of the hexagon image panels, I’ve taken a black marker along the edges to make the stitch lines. I went around the edges of the image panel with some Tumbled Glass Distress Ink and ink foam blending tool for each card. Also, for the sentiments on each card, I found an old “bee” style stamp set and used it to go with them. I believe that the “Bee Happy” rubber stamp set comes with sentiments that go perfectly with these cuties!
Here’s how all of the bees were colored up with the Copic colors:
Wings/around bees – B00, B000
black stripes/nose/feet and hands – W9, W7, W5
Yellow stripes – Y17, Y15, Y13, Y11, R20 (cheeks)
The tiny heart from the sentiment was colored with Y15 and then I’ve added some Nuvo Glitter Drops over it.
All the wings for each card were covered with the Wink of Stella Glitter Pen.
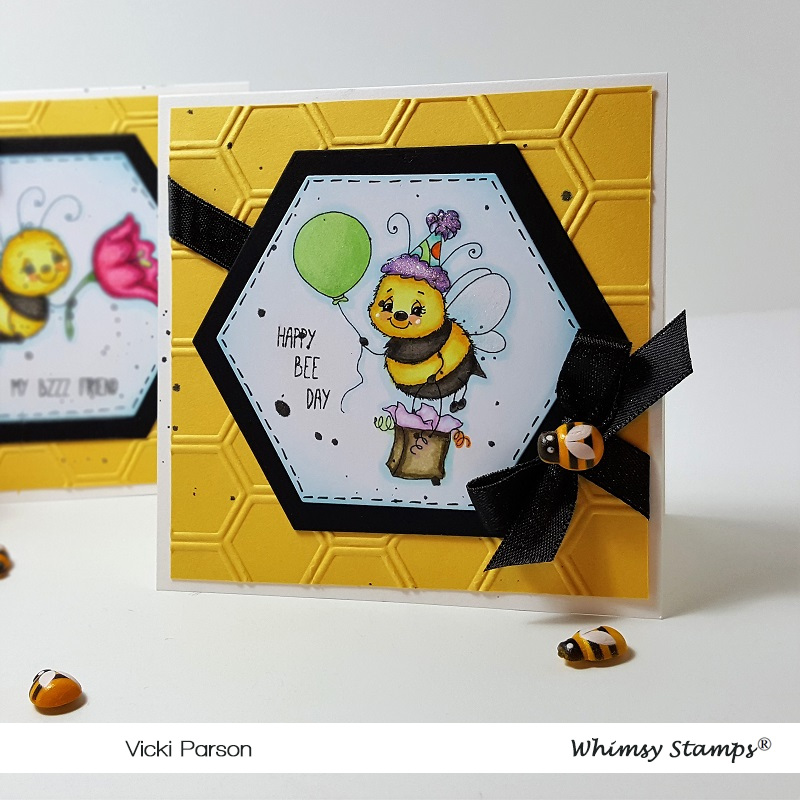
This little dude was so fun to color up with his party accents! 🙂 Here are the Copic colors I’ve used for the accessories:
bag – E87, E84, E81
hat balloon, party hat, tissue from bag – V12, V15, YG11, YG13, YG25, YR04
I’ve covered the purple on his hat with the Nuvo Glitter Drops
The wings and balloon were covered with the Wink of Stella Glitter Pen
I just love how he’s trying to hand out a flower to you! 🙂 Here’s the following Copic colors that I’ve used for the flower:
flower stem – YG61, YG63
flower middle – Y15 (I covered it with the Nuvo Glitter Drops again)
flower petals – R32, R35, R37
His wings were covered with the Wink of Stella
I hope you’ve enjoyed my bee creation today! Please be sure to BUZZZZ on over to the Whimsy Stamps store!
Thanks so much for stopping by and I’ll see you again soon!
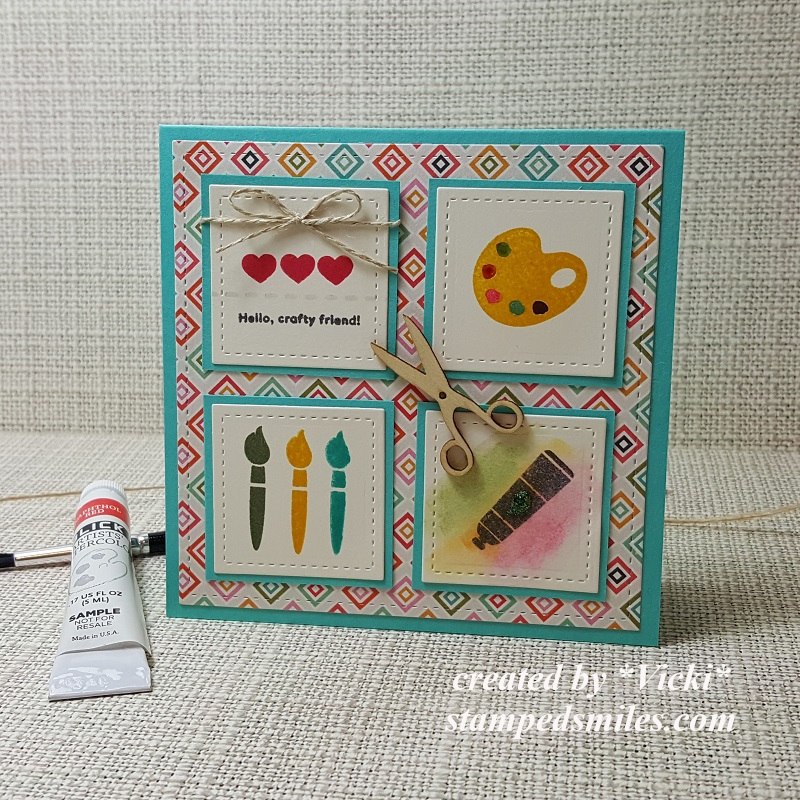
Hello friends! It’s “Hip to be Square”, right?! That’s what the theme of this week’s new challenge is over at Cute Card Thursday! So please hop on over and check out the inspiration and play along with us! Here’s the card I’ve made for the challenge:
What better card to make than one for a crafty friend! 🙂 I’ve used a past Simon Says Stamp card kit from February 2018 for this one. I thought that I would carry the “square” theme throughout the design. – It’s great to pull out past kits and have a play with them!
The stamp set is called SSS Crafty Friends and I’ve randomly stamped some of the images on a vanilla-colored cardstock and then cut out each one with a stitched square die cut. I’ve also used the same die to cut out a square piece of decorative paper contained in the kit which also has a colorful square pattern on it.
For the paint pallet image as well as the tube of paint panels, I took some of the watercolor provided in the kit and added it for some color with a water brush. I took some twine and wrapped it around the top left panel with the hearts and sentiment and then placed the bow over top. I then added the scissors wood veneer over top which was also included in the kit. The turquoise-colored cardstock base and squared layered panels also came from the kit as well.
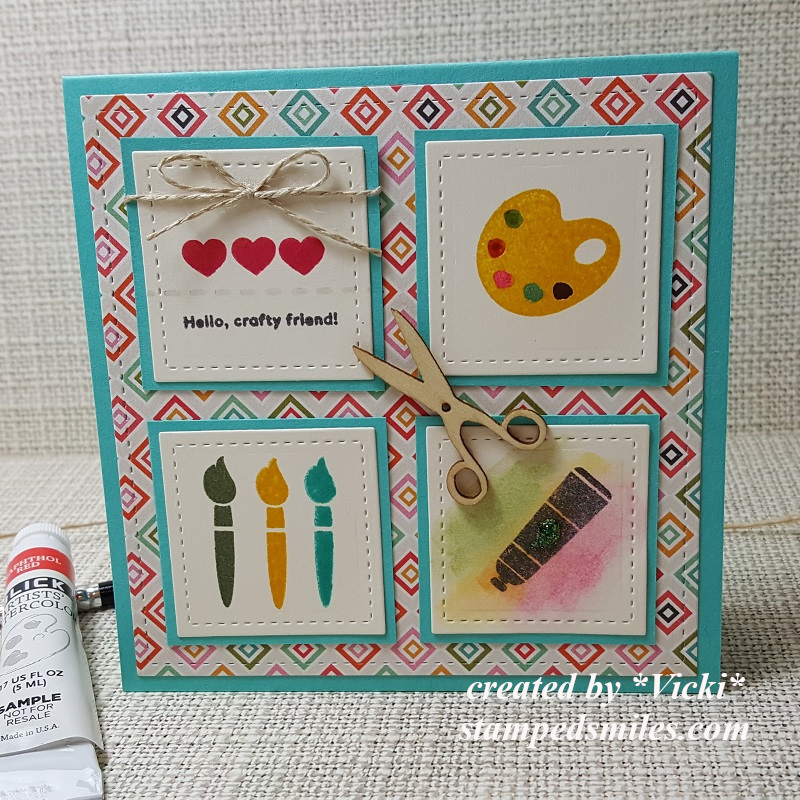
Here’s an even closer look at the different squared panels. You can better see the watercolor over the panels as well as the turquoise colored Nuvo Glitter Drops that I’ve added to the paint tube on the bottom panel.
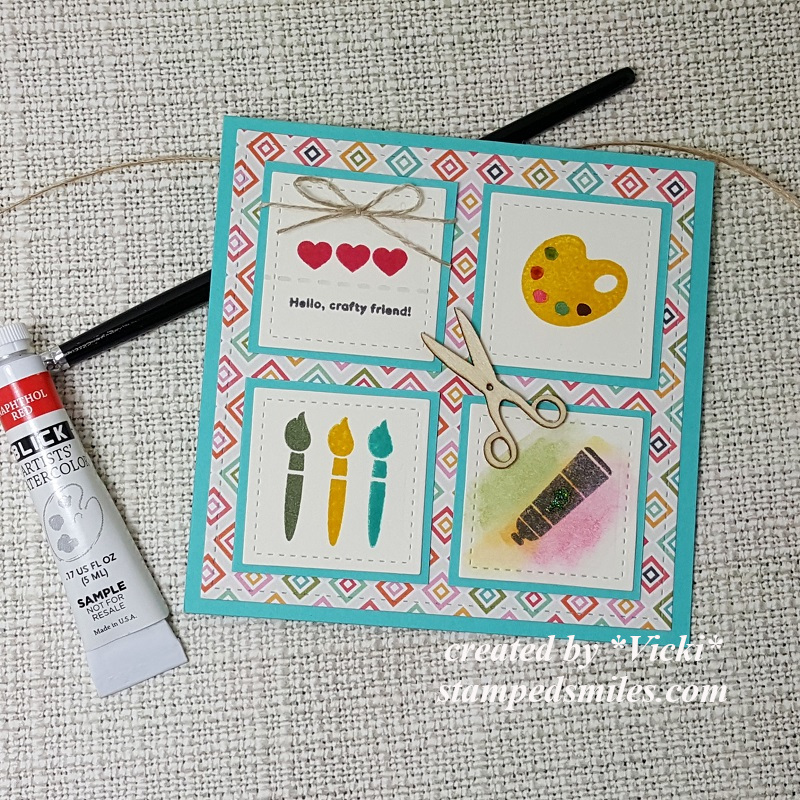
Hope you’ve enjoyed my “SQUARE” card today!
Thanks so much for dropping in! I’ll see you soon!
It’s been SO gorgeous outside with this wonderfully warm weather we’re having right now, so I find it hard to stay indoors right now! We have rain coming, so I will be able to get some crafting done then!
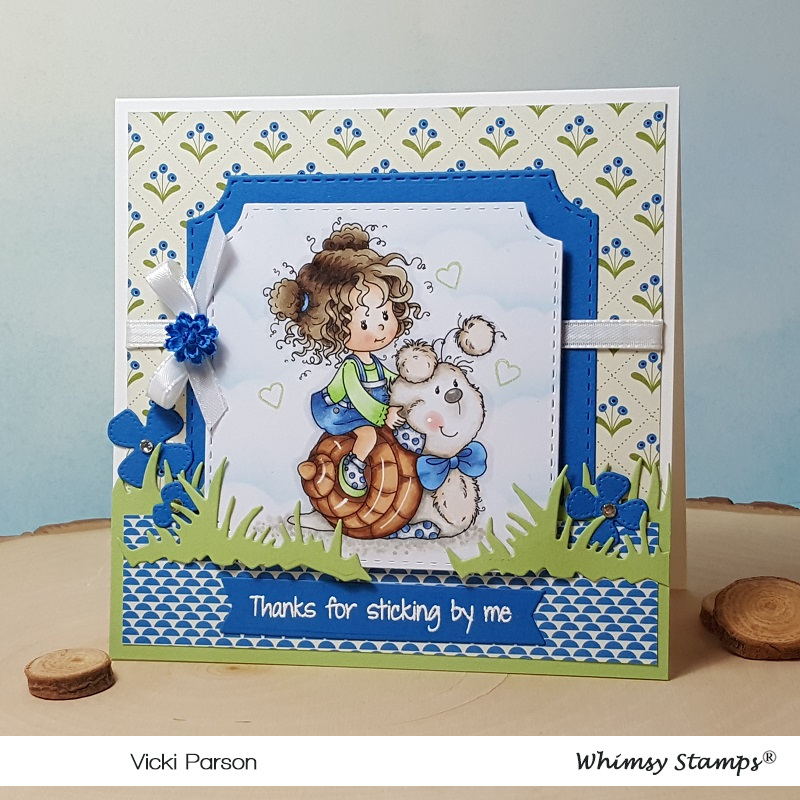
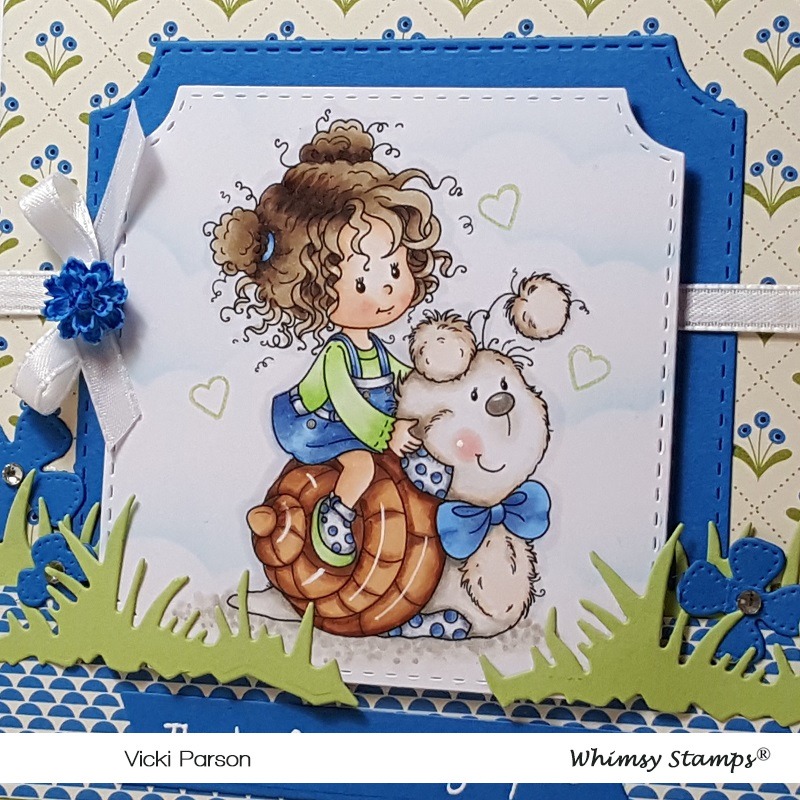
Swinging by to share this really sweet digital image by Sylvia Zet for Whimsy Stamps called Cuddly Ride! They have sold the rubber stamp version, but now they’re releasing these older images as digital files now! So weather you like the rubber stamp or the digital images, it’s great to know that you can choose either!
Used a white gel pen for highlights on snail and covered the ground with a Wink of Stella glitter brush pen
After coloring her up, I also sponged some clouds behind her with a stencil and then cut it out with the Whimsy Stamps Notched Square Dies. I’ve also cut an additional larger blue layer for behind the image. For the blue flowers scattered around as well as for the pieces for grass accents on my card, I’ve used the Whimsy Stamps No-See All Seasons Tree Dies.
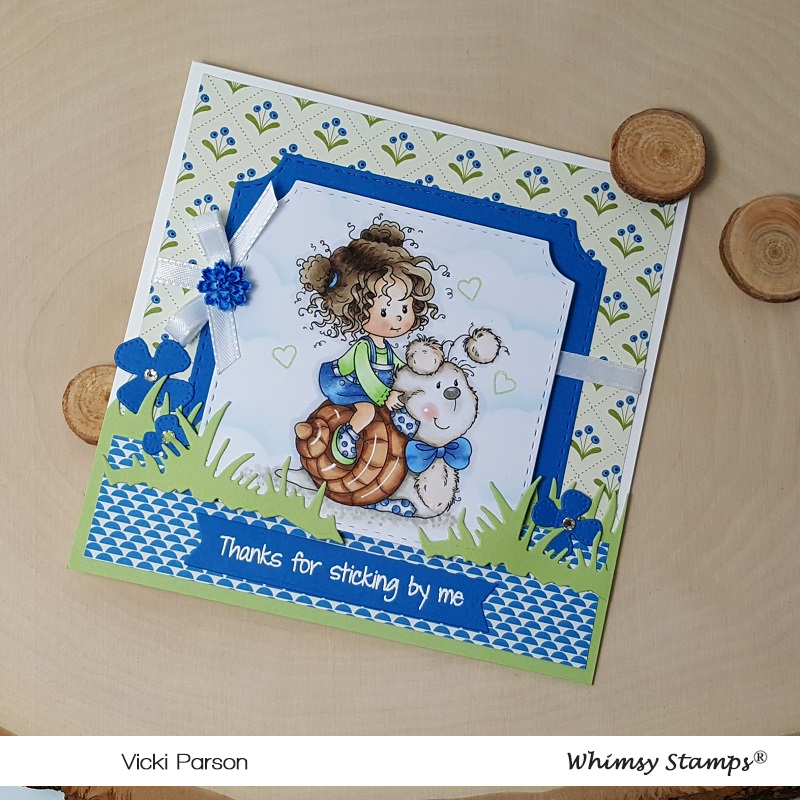
I’ve taken a sentiment from my stash (retired Whimsy Stamps) and white heat embossed it over a piece of the blue cardstock and then I’ve used the Whimsy Stamps Quick Strips Die Set to cut it out. Lastly, I’ve added some ribbon, a bow with a resin flower glued over the center of it and then I’ve added some rhinestones to the centers of the blue flowers.
From the same sentiment stamp set that I’ve used, I took a tiny heart image and stamped it with green ink around the colored image. Of course, I tried to capture the wonderful shimmer underneath the snail where I’ve colored the Pointillism technique, but it just won’t show up in photos very well, but I just love the shimmer under him! I also used a silver metallic gel pen to color the “buttons” on the girl’s jumper.
I thought she turned out really cute and I think this would make a wonderful card for that special friend who is always by your side!
That’s all for me now. I think I may need to go back outside and enjoy some fresh air and sunshine before it’s gone! Have a lovely day!
Hello friends! This week has completely flown by me so very fast!! I can’t believe how quickly it went and I’m thinking being outside in the warmer weather will make it go even quicker! Summer will be here soon, right?!
Today is Thursday and also the first Thursday of the month, which means it’s time for our regular “Anything Goes” theme at Cute Card Thursday! We are also sponsored by our regular monthly sponsor Whimsy Stamps! So of course, you know I’m going to be using one of those for my creation today:
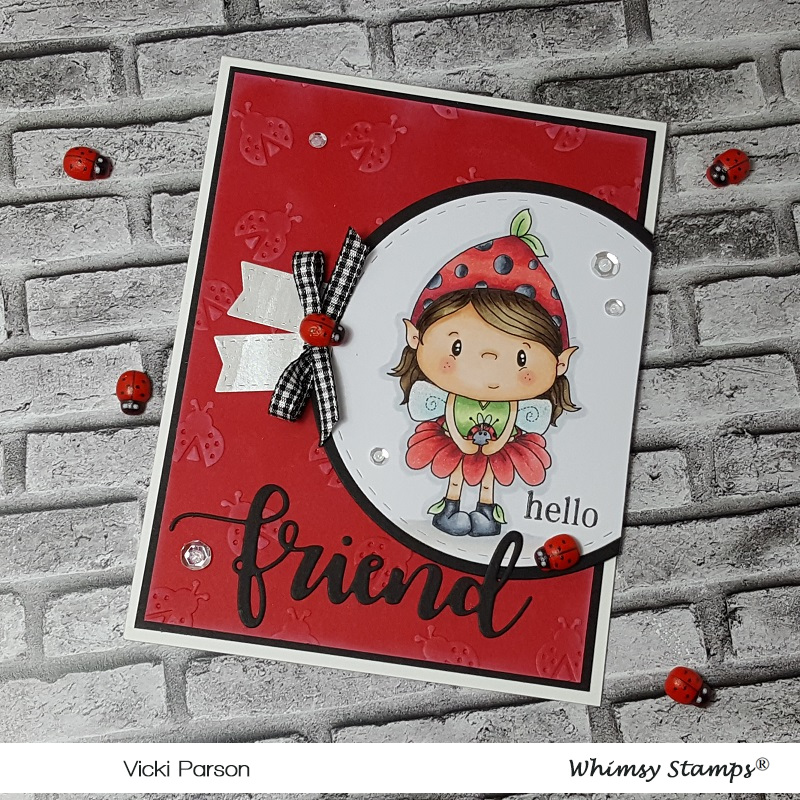
Isn’t she just a cutie?! This newly released digital image is called Elfie from Whimsy Stamps. I’ve been starting to see a few lady bugs here and there around my area, but I actually don’t like it when they are everywhere! Otherwise, I can take them on a card and think they’re so cute!
After coloring her up, I cut her out with a stitched circle die and layered another circle with black cardstock behind her. I also cut out the Whimsy Stamps Friend Word die set with black cardstock and set it aside to work on the rest of my card.
I pulled out this embossing folder with lady bugs (by Darice) and embossed a piece of red cardstock with it. I took some white ink to lightly go over it to highlight the texture a bit. I layered this piece onto a piece of black and then layered these over a white A2 sized top folding card base. The circle image was place towards the right of the card and then I just cut off the excess circle with scissors.
I stamped the “hello” from the Whimsy Stamps Painted Sayings clear stamp set with black ink next to the image. The “friend” die cut piece was glued at the bottom of the card. I also took the WS Quick Strips die set to cut out a couple of stitched banners from some shimmer paper and added them to the side of the circle. Lastly, I’ve put the black gingham ribbon bow over the banner strips and added the lady bugs and sequins to the design. I filled the sequins with some Nuvo White Blizzard Glitter Drops.
Here’s a closer look at the coloring of this cutie. I’ve used some Copic markers to color her in and then I’ve used a Wink of Stella Clear Glitter pen to add some shimmer over her wings and the wings on the butterfly. Here’s the list of Copics I’ve used:
Hat, skirt, shoes and ladybug – R39, R37, R35, R32, C8, C5, C3
Shirt, leaves – G24, G21, G20
Hair – E49, E47, E44, E43
Skin – E21, E13, E00, E000, R20
I think there are so many different ways you could color up this image, but I saw her holding this little ladybug and so I just went with that theme when coloring. Hope you’ve enjoyed my card today and got inspired!
Hello friends!! I’m so happy that we are into March as I hope to be feeling warmer temps and “seeing the green” very shortly over my way! I’m more than ready for that!
In the meantime, how about we celebrate with some inspiration!
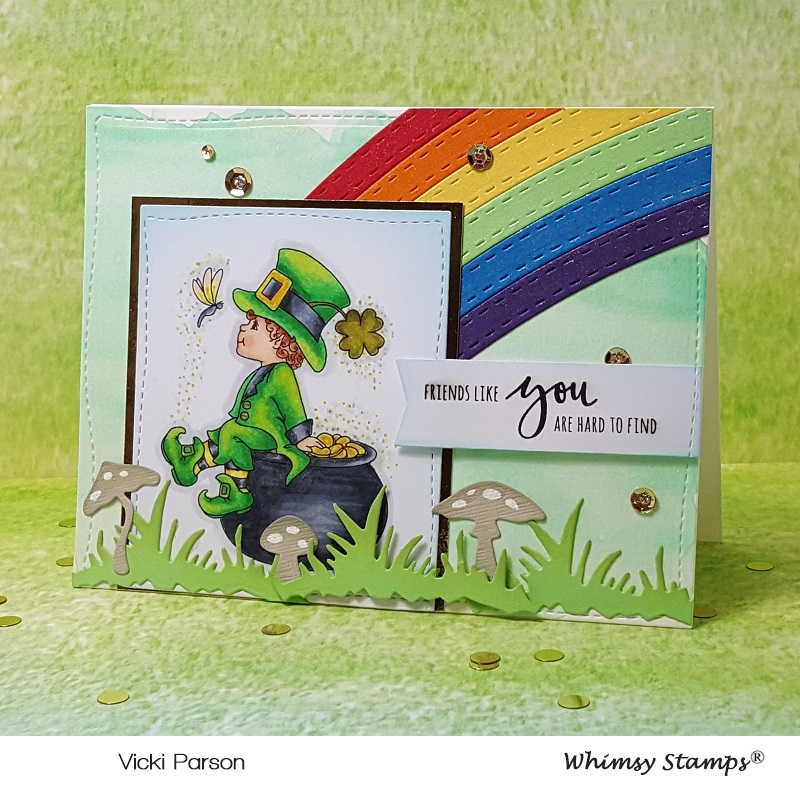
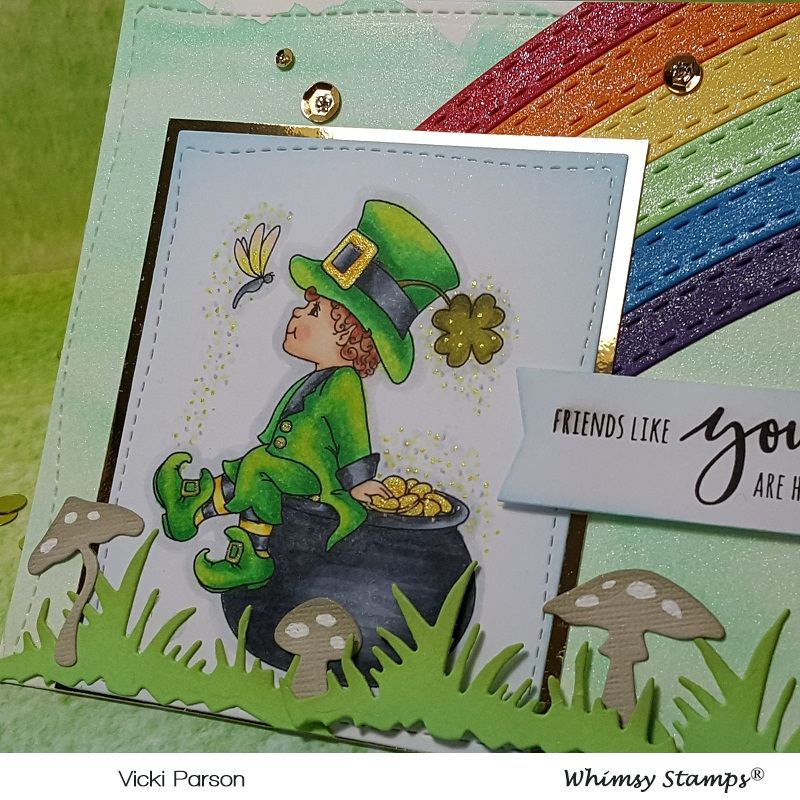
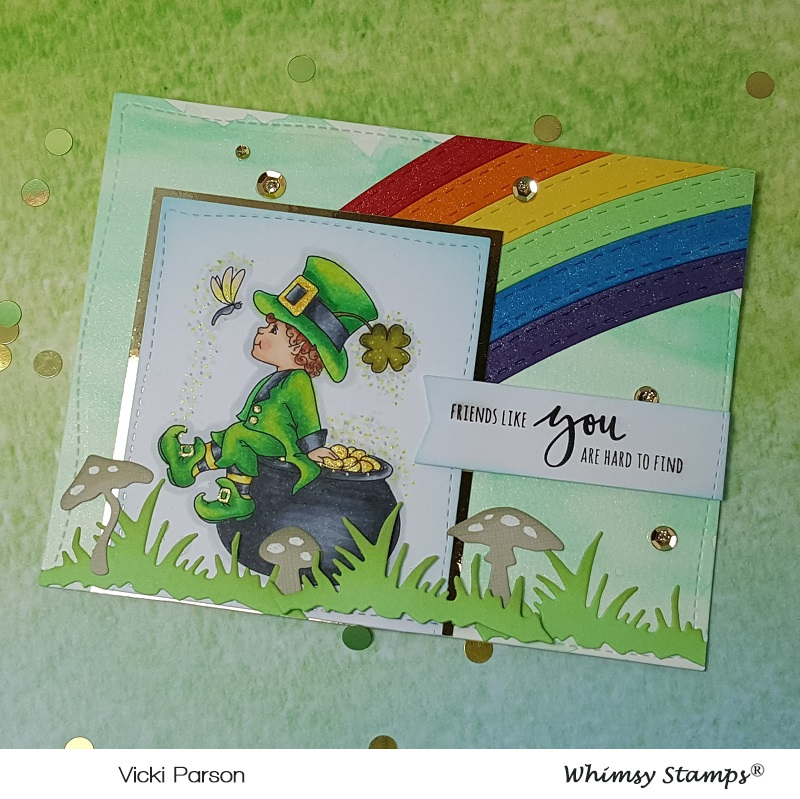
I have made this super fun (mostly green) card especially for this fun event with the really adorable Little Leprechaun digital stamp by Crissy Armstrong. I thought he was so cute sitting atop his pot of gold with his new winged friend there! He was so fun to color up for this card! (See the Copic list below!)
For the card, I started out with some watercolor paper, and I’ve used some Aqua pigments (liquid watercolor from Brutus Monroe) and some extra water for the background of my card, then I cut it out with the Whimsy Stamps Hand Stitched Nested Rectangle Dies. I also used this to cut out the leprechaun image too. I’ve used some gold mirror cardstock to mat a layer of it behind the image panel.
I thought it would be fun to add a rainbow behind the image panel, so I took the WS Kinetic Curved Hills die set and cut strips with the straight curve die in the colors of the rainbow and added the strips over the background. Then I attached the layered image panel and took the WS No-See All Seasons Tree die set to cut some grass and mushrooms to attach at the bottom of the card. I used a white gel pen to color the spots on the tops of the mushrooms. I also sponged some ink over all the pieces. One of the sections of grass was popped up with foam tape. Lastly, I took an older sentiment from Whimsy Stamps and made a banner that was popped up with foam tape over the design. I then mounted the entire card panel over an A2 top folding white card base.
Here you can see a close-up view of the coloring. I have used the following Copics to color in the image with:
outline of image and “dots”: C3, C1, C0, Y11, gold gel pen
You can also see the rainbow has some shimmer on it. This is where I took a Spectrum Noir clear glitter brush pen to go over it. You can also see a bit of shimmer from the Aqua pigments in the background…they’re really stunning, and I’ll be using them again in the future, so be sure to check back!! 🙂
I wanted to bring out some more of that gold with the mirror layer behind the leprechaun, so I brought some gold sequins into the layout and filled them with some gold Stickles. When you hold this card up to the light, the whole thing really shimmers and sparkles!! I loved how it turned out! I hope you’ve enjoyed it too!
Thanks so much for dropping in today!
Challenges I’d like to enter this card for:
Double Trouble – challenge #23 – “Thing 1“: The Wearin’ O’ the Green “Thing 2“: Collaboration with Heart 2 Heart Challenge (entered below!) “Thing 3“: Include a golden touch (used gold mirror cardstock and sequins filled with gold Stickles!)