Penny’s Paper-Crafty Guest Designer “Sealed With Love”

Hello friends and happy Wednesday!  We seem to be rolling well into this month of March and my thoughts are turning to Spring and being able to get outdoors again after the cold winter months get put behind us!  I’m seeing a couple of buds on my daffodils…yay!
Pennys Challenge Blog BadgeI’m super excited to be sharing a card with you today that I’ve made for Penny’s Paper-Crafty Challenge Blog as a guest designer for their #517 challenge!  Last month, I had won a top pick for a prize as well as a future guest design spot with my calendar cards that I had entered.  The challenge is always “Anything Goes using Paper“, so I hope you will take the time to join in the fun with us for this challenge!  Here’s what I’ve created:

Isn’t this fella so cute?!  I was given a few choices of images from the challenge sponsor(s) to use for my creation and I picked out this adorable image from Pattie’s Creations called, of course, “Snail Mail“.  You can click on the name to get him in the store!  Who doesn’t love a good snail mail especially with that adorable smile! 🐌  I colored him up with my Copic markers adding a few dotted details with my white gel pen.  He was fussy cut with scissors and popped up with foam tape.

So, I thought it would be fun to create a background for him using the Taylored Expressions Sealed With Love background stamp.  I used the heart stamp to give color and then colored the one envelope underneath the snail.  I also used the sentiment in the clear set that comes with it and white heat embossed it over a strip of cardstock that was later added to the design.

I cut the background in half diagonally and used the Lawn Fawn Stitched Cloud Portrait Backdrop die and then sponged some blue ink over top of it.  I used the top portion of it for my card front and cut this piece as well as the bottom stamped piece with the Lawn Fawn Small Cross-Stitch Rectangle Stackables die.  To break up the section of where these two pieces meet on the front, I took some dark brown cardstock and cut a strip with a My Favorite Things border die.  I layered this onto a piece of cardstock that was used for the sentiment and that’s where the ends of the scallop border was cut off.  I then attached all of the layers onto an A2 sized white top folding card base.

I decided to die cut some hearts out with the same-colored cardstock (as the sentiment piece) to place above the snail’s head.  I added some sparkle over them with some Stickles “Star Dust” glitter.  I used it for the snails’ antennas and underneath his body where he’s sliding across to deliver his envelope.

I do hope that you’ve enjoyed my creation today for Penny’s challenge and will think about popping over there to see the wonderful inspiration from the design team!  I sure had fun playing along too!

Thanks for dropping by and I’ll see you soon!

Challenges:

  1. Love to Scrap – March Anything Goes
  2. The Male Room – Animals3. March
  3. Colour Crazy Craft – Anything Goes with coloring
  4. Creative Fingers – Anything Goes
  5. My Time to Craft – Animal theme
  6. Pammie’s Inky Pinkies – PIP2211 Anything Goes
Cheerful Sketches Guest Designer “Gnomie”

Hello friends!  I think we’re getting closer and closer to Spring!  I sure am ready for it, how about you?  Let’s welcome the warmer weather and pretty flowers to come!

Herschaalde kopie van RON ILONKA

I had previously made a winner/top 3 for a challenge I had entered which was exciting to have also won a place to be a future guest designer for one of the challenges too.

So this month, I’m very excited to be joining my friends over at the Cheerful Sketches challenge blog as a guest and they always have a beautiful sketch along with lots of inspiration for it each month!  So please be sure to check them out and play along if you can!  Here’s the lovely sketch they’ve provided for me to work with this month:

This is a very nice sketch and open to lots of different interpretations as well, so I had fun playing with it along with an image that was provided to me from a current sponsor for the challenge and here’s what I came up with:

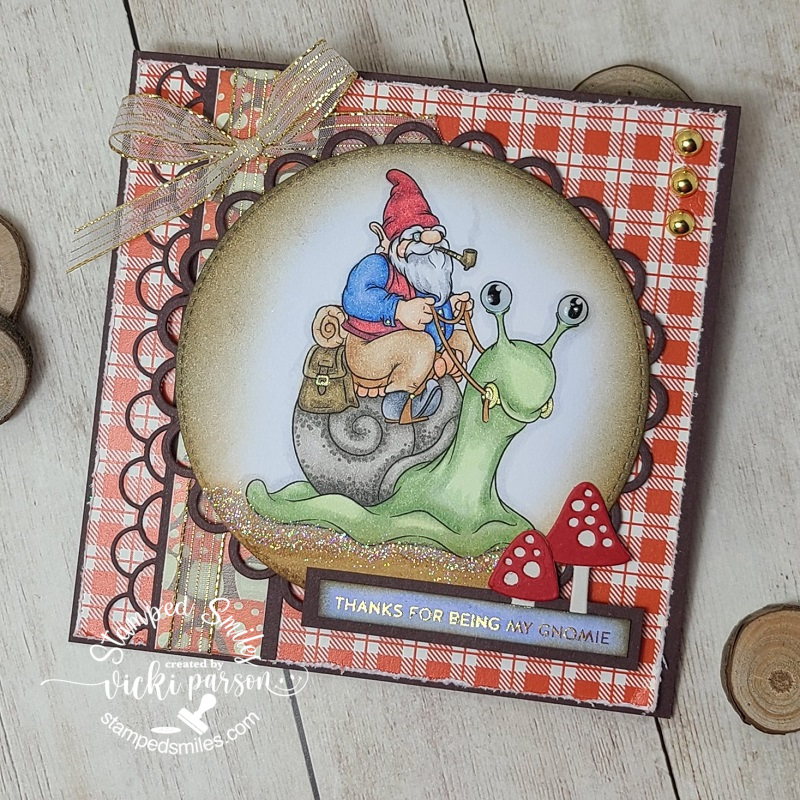
Everyone loves the gnomes and this one is too cute riding his snail friend!  I’m using the “Grumblebonce Rides Again” from Dr. Digi’s House of Stamps for my card today.  I’ve colored him up with Copic markers, added details with gel pens, glitter under the snail and glossy accents on the snail’s eyeballs.  I die cut the image with a stitched circle die and ink blended around the edges before attached to another loopy circle die cut from brown cardstock.

I found some fun papers fitting for the image with red plaids and a strip of mushrooms that I’ve attached over another loopy die cut strip I’ve had in my stash forever.  I wrapped some gold ribbon around it and attached to the red plaid papers that are attached to a 5″ square top folding brown card base.  Before attaching the red plaid papers, I used a distress tool to rough up the edges.  I’ve popped up the image with foam tape and added 3 gold enamel dots in the upper right corner.

With the card now laying flat, you can better see some of the shine from the sentiment at the bottom.  I found these fun gnome style sentiments that can be foiled.  So I used some gold foil and ran the strip through my Minc Machine.  I sponged some blue and brown inks over it and then added some die cut mushrooms behind it and layered a piece of brown cardstock to layer behind it.  

I placed the mushroom sentiment at the bottom with a portion of it with foam tape and the other parts just glued to the circle sentiment panel.  I think it turned out pretty cute and I had fun coloring it up!

So please be sure to check out the challenge and come play along!

Thanks so much for dropping in and I’ll see you soon!

Sending Snail Mail Hugs

Hello friends!  Yippee!  It’s finally “officially” Fall now! (According to the calendar anyway.) We are very slowly starting to get lower temps at least in the evening time anyway.  I’ve gotten out my Fall decorations and I’m ready!  How about you?

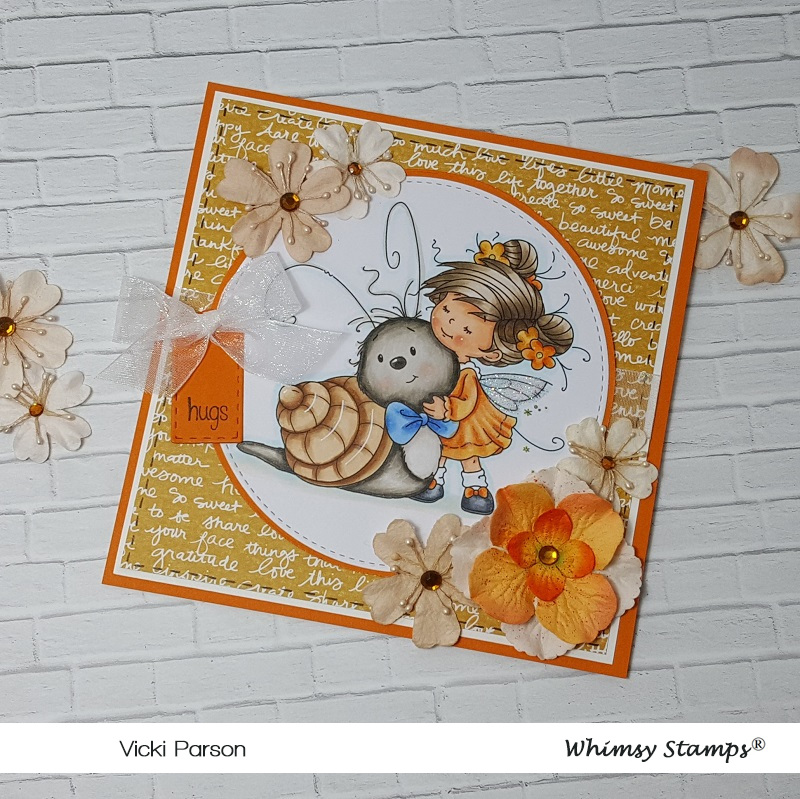
Today I have a very sweet image from Whimsy Stamps to share with you:

Vicki-WSLoveSlowMuch-Sept24

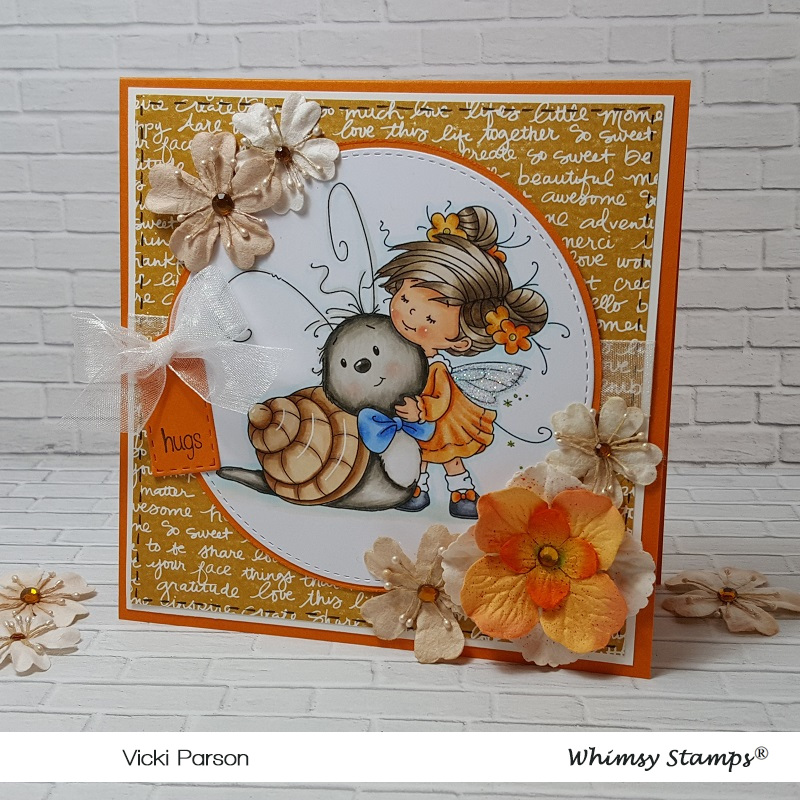
Awe!  I wouldn’t normally hug a snail, but I must say, this one is SUCH a cutie don’t you think?  This digital image is called “Love You Slow Much” from Whimsy Stamps-Sylvia Zet’s Wee Stamps Collection which was previously released as a rubber cling stamp.  So now you can have the option of choosing the digital or the rubber versions!

Of course, with Fall having started, I was really inspired to create with this cutie in some orange, yellow and tan toned colors!  With the exception of that blue bow tie on the snail, I’ve colored it differently as I think that makes him really stand out especially for dispensing hugs…or perhaps receiving them! 🙂

I’ve cut out the image with a stitched circle die and then die cut another larger circle in the orange color to mat behind that.  I’ve taken a piece of decorative paper from my stash with the wording and added some stitch marks along the edge of it with a black marker and then mounted it to a piece of white cardstock.  I wrapped some white organdy ribbon around these two pieces and mounted it onto an orange 5″ square top folding card base.

I took another piece of orange cardstock and die cut a tag out from an older Whimsy Stamps die that I have and then I stamped the “hugs” sentiment from the Whimsy Stamps Everyday Mini Sentiments clear stamp set towards the bottom of the tag and added it to the bow on the ribbon.  Lastly, I took some flowers and attached them around the card design.

Vicki-WSLoveSlowMuch-Sept24-close

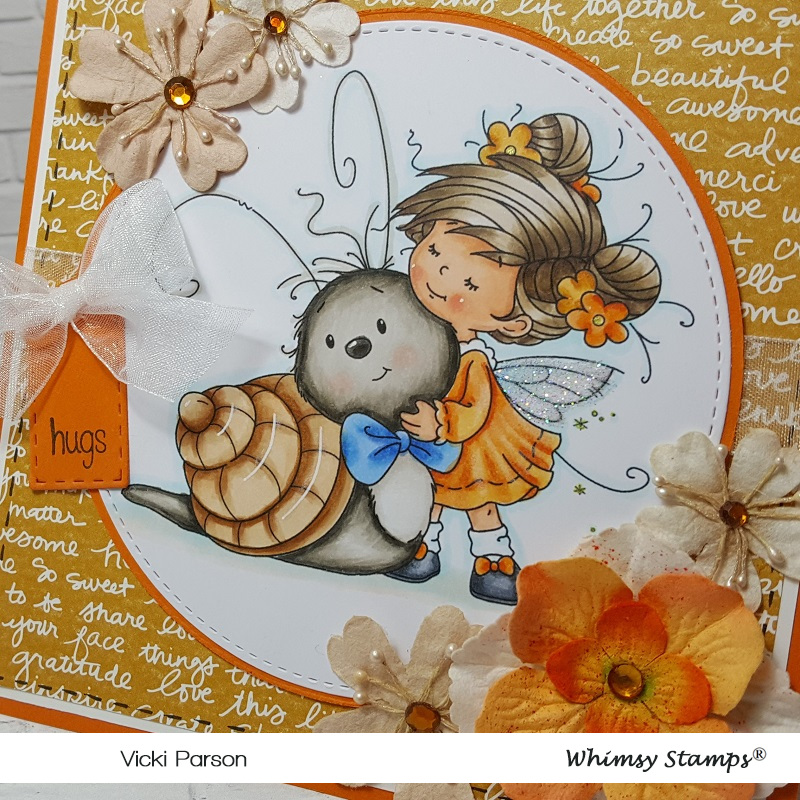
Here’s a closer look at the coloring I’ve done on this image and used the following Copic markers:

  • Snail Body:  W7, W5, W3, W1, R00
  • Snail Shell:  E35, E33, E31, E30
  • Snail Bow Tie:  B26, B24, B21
  • Fairy’s Dress, Hair Flowers, Shoes, Wings:  YR07, YR04, YR02, BG000, C7, C5, C3
  • Fairy’s Hair & Skin:  E47, E44, E42, E41, E21, E11, E02, E00, E000, R20
  • I used BG000 and E0000 for around image and shadows
  • I’ve also used a gold gel pen for the center of the flowers in her hair and over the tiny marks behind her wings.  I’ve used a white gel pen for highlights in the Fairy’s cheeks as well as highlights on the snail’s shell.  I took a glue pen over her wings and added some clear glitter over them.
  • I’ve also used a Copic marker (unsure of color) to color a rhinestone for the center of the orange flowers.

Vicki-WSLoveSlowMuch-Sept24-flat

I hope you’ve enjoyed my creation today and that it has inspired you in some way!

Thanks so much for stopping in today!  I always appreciate your support!  I’ll be seeing you soon!!

Challenges I’d like to enter this card in:

  1.  Creatalicious – Anything Goes with optional circles
  2. Stamps & Fun = Creativity – Anything Goes
  3. The Paper Girls – Anything Goes
  4. The Fairy & The Unicorn – Fantasy Anything Goes
  5. Creative Knockouts – Anything Goes
  6. QKR Stampede – Anything Goes #364
  7. Creative fingers – Anything Goes
  8. Always Fun – Cute Critters

Imagine…You’re Home!

Hello friends!  I have to say that I’m very happy that we’ve started the month of March and I really look forward to seeing the bit of green and growth soon to come!

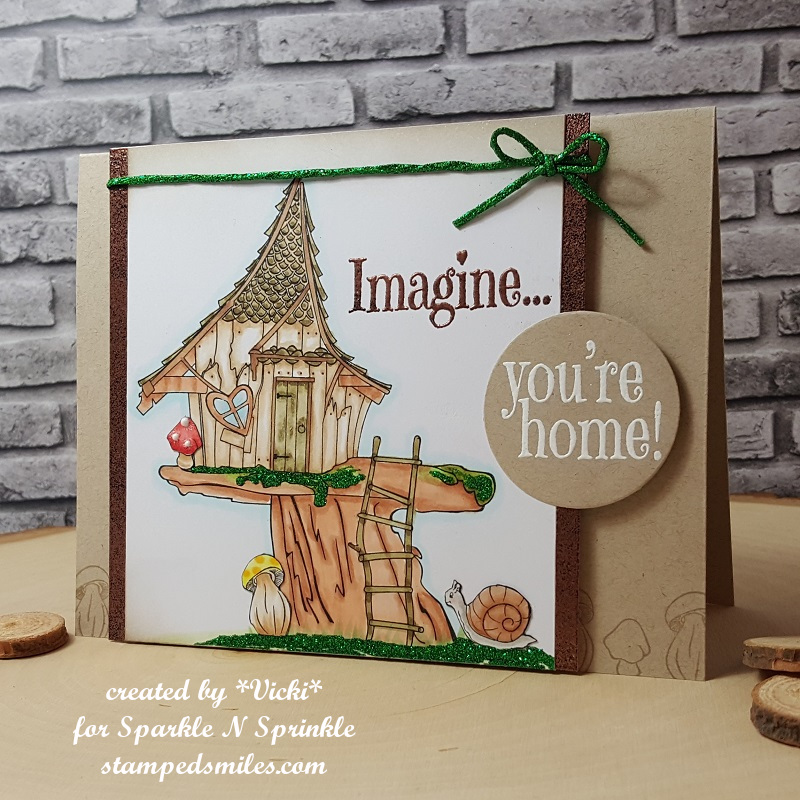
Today, I have a card using this new stamp set:

Vicki-SNSCottage

Today, my card features this really fun Lil Garden Cottage rubber stamp set.  I have colored it up with my Copic markers and I’ve used the packaging from the stamp set to help with color suggestions.  (I really like that when stamp sets have a colored version on their product labels!)

Since last year I’ve been noticing lots of “fairy garden” projects, and I am amazed at how many “tiny” items that are available to purchase so that you can create your own little garden!  This image sort of reminds me of that!  I think I like creating my own little “fairy garden” on paper! 🙂  Do any of you like to make Fairy Gardens?

For the base of my card, I’ve used an A2 sized top folding kraft card base.  I took my VersaMark ink to stamp the tiny mushroom images from the set along the bottom edge of the base.  I also took another piece of kraft cardstock and heat embossed part of the sentiment with the White EP and then cut it out from a circle die.  I set these pieces aside while working on the rest of my card.

Vicki-SNSCottage3

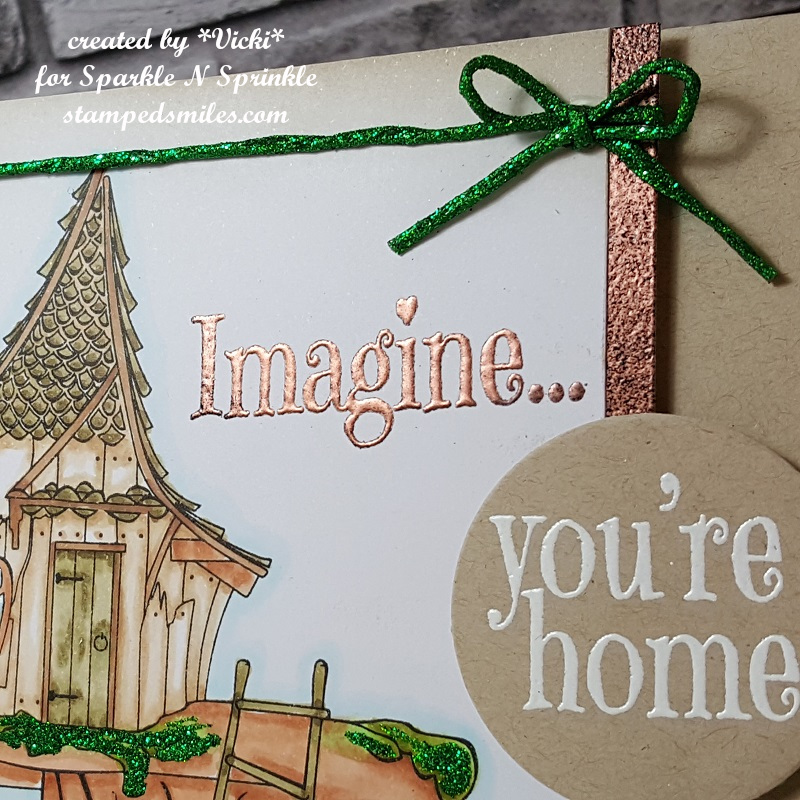
After coloring in the image, I also took the other portion of the sentiment “Imagine…” and stamped it next to the cottage image, but then heat set that one with the Coffee EP.  I also took an additional piece of white cardstock to layer behind the image panel.  For that piece, I took my VersaMark ink pad and sponged along the edges of it and also heat set that with the same Coffee EP as well.  You can also see at the top of the image panel that I’ve lightly blended in some distress ink to soften up the white a bit.

For the sparkly twine at the top, I created it by taking the 1/4″ Tear Tape and twisting it on itself and then I ran it through some Shamrock Glitter.  I took a piece of it to make a bow and then glued it over my design.

I took some craft foam to pop up this image panel a bit before attaching it to the kraft card base.  I also took some more craft foam to pop up the side of the circle sentiment panel as well.

Vicki-SNSCottage2

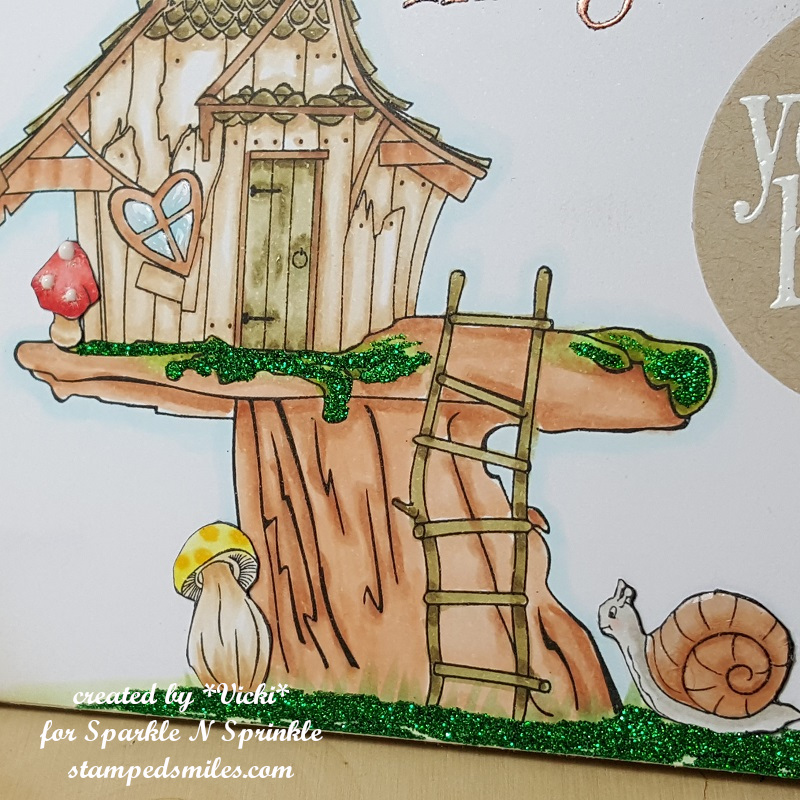
To add a bit of detail to my image and make it my own, I stamped, colored and fussy cut out each of the mushrooms as well as the snail and then attached them where I wanted them to show up on my image panel.

I used the Nuvo Precision Glue Pen to “color in” the areas where I wanted it to be green and then sprinkled some of that Shamrock Glitter over those areas.  I took the Nuvo White Crystal Drops to add a few “dots” over the red mushroom.  I then took the Nuvo Morning Dew Crystal Drops (dries clear) and filled in the “window” on the cottage as well as the “snail shell” to add some shine to it.

Vicki-SNSCottage4

I hope you’ve enjoyed my card today and that you’ve been inspired!

Thanks so much for dropping in today!!  I’m so hoping that I can get back into catching up with you and getting caught up on entering challenges!  I do miss all of this!

Wishing you a happy day!

Cute Card Thursday is Getting “Too Cute”!

Hello friends!

It’s Thursday and time for a new challenge at Cute Card Thursday!  If you are not challenged by the title of the challenge blog, then let’s get even cuter by making the challenge this week “TOO CUTE“!!  LOL!  We’re looking forward to seeing your cute creations in the gallery!

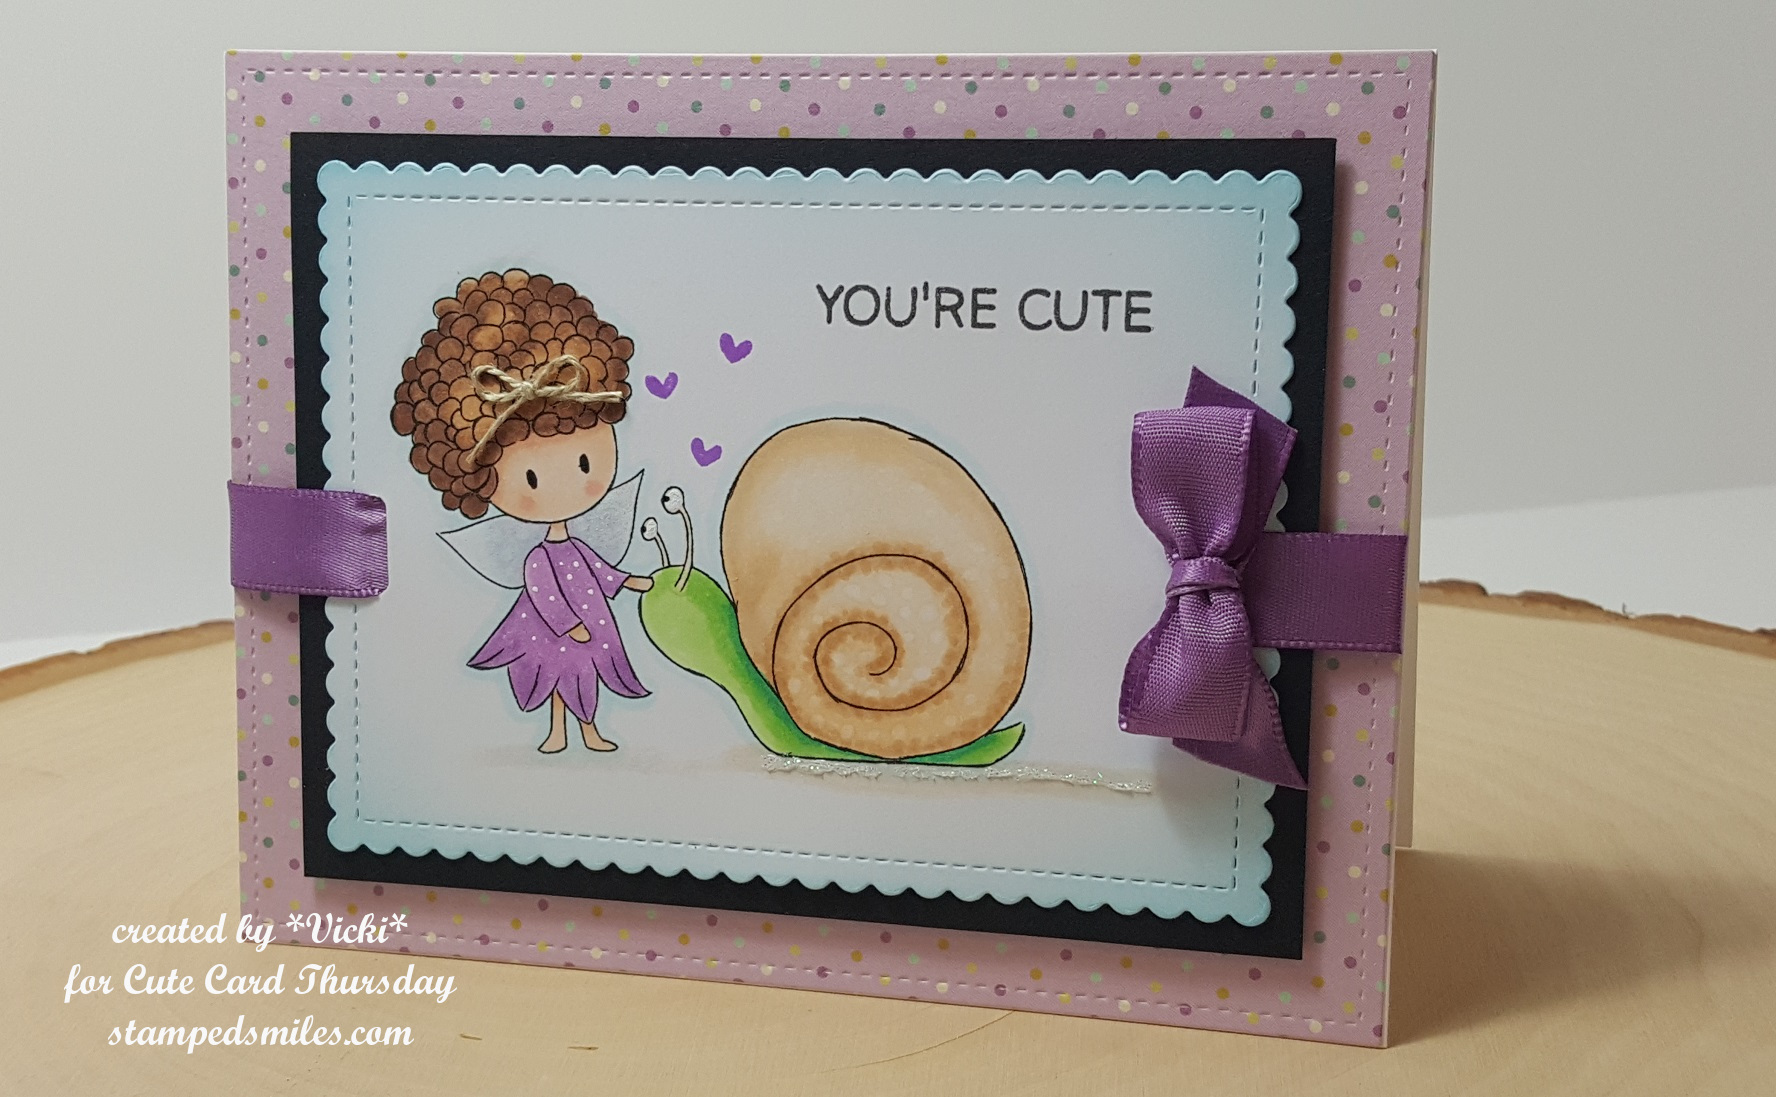
Our sponsor this week is Kinda Cute and they have kindly donated an image that I have used on my card for you today:

Vicki-CCT540-TooCute

When I saw this image, I thought this was perfect for the challenge theme!  I have used the Fairy and Snail digital stamp from our sponsor.  I printed it out and colored it in with Copic markers.  I have used a white gel pen for certain areas, and I have added some Spectrum Noir clear glitter pen over the fairy wings.  I have also used some Nuvo White Blizzard Glitter Drops for some sparkle underneath the snail where it’s wet from his ‘slithering path’.

I have also taken the Lawn Fawn stamp set Stinkin’ Cute (of course) and stamped the sentiment above the image in the top right corner.  I also decided to take the solid heart from the set and stamp a few purple hearts between the characters.  I also took some linen thread to make a tiny bow because I thought the fairy would look CUTE with one on her curly hair!  LOL!

I cut the image panel out with the My Favorite Things Stitched Mini Scallop Rectangle STAX die and then sponged some Tumbled Glass distress ink around the edges of it.  I mounted it onto a piece of black cardstock and then I wanted to add some ribbon to it so I took my slot punch and punched out a hole on each end of the image panel to slip some silk purple ribbon around it.  I tied a bow and added it over top to the right side.  I then found some purple dotted papers and cut out a panel with the Lawn Fawn Large Stitched Rectangle Stackable die to cut it out with.  The purple ribbon was secured onto the back of this piece and then mounted onto a white top folding card base.  Before sticking down the image panel, I put some fun foam on the back for a bit of dimension.

Thanks so much for dropping by!  See you soon!

Challenges:

  1.  Stamps & Fun = Creativity – Anything Goes
  2. Make My Monday – colored image.
  3. Addicted to Stamps & More – Make Your Mark
  4. Crafty Creations – Anything Goes
  5. Crafting by Designs – Anything Goes